If you’ve ever tried to cut a tough plastic or metal pipe with a hacksaw, you know how tiring it can get. I remember sweating through crooked cuts, rough edges, and wasting more time than I cared to admit. Then I found the ratcheting pipe cutter. It was a game-changer for my DIY plumbing projects. Using one is not just about squeezing and hoping for the best. There’s a method to it. In this guide, I’ll share what I’ve learned from using ratcheting pipe cutters, step by step. I’ll cover what you need, the right way to use it, mistakes to avoid, and little tricks that made my work smoother. Whether you’re a total beginner or just want better results, I hope my tips will save you time—and a few headaches.
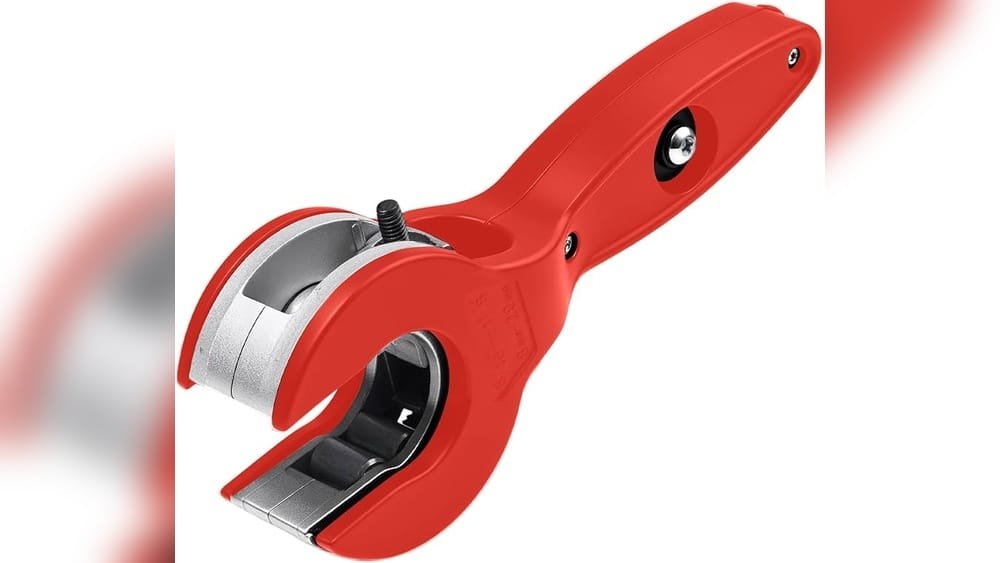
What Is A Ratcheting Pipe Cutter?
The first time I picked up a ratcheting pipe cutter, I thought it looked almost like a big pair of scissors with a gear in the middle. Unlike a hacksaw, this tool uses a sharp blade and a ratcheting handle to slice through pipes. It’s mostly used for cutting PVC, PEX, and even some thin metal pipes. The ratcheting action means you don’t have to squeeze all at once. Instead, you pump the handles, and the blade moves a bit further with each squeeze.
I quickly realized how much cleaner and faster it was compared to sawing by hand. The edges were smoother, and I made fewer mistakes. The cutter fits in one hand, and you can use it even in tight spots. It’s a small investment but pays off almost right away.
When Should You Use A Ratcheting Pipe Cutter?
I once tried to use my ratcheting cutter on a thick metal pipe and quickly learned my lesson—the blade stalled, and I almost broke the tool. These cutters shine when you’re dealing with plastic pipes like PVC and PEX, or thin-walled metal pipes such as copper and aluminum. They’re perfect for:
- Home plumbing repairs
- Installing sprinkler systems
- Running conduit for electrical projects
- Making quick, clean cuts for DIY crafts
If your pipe is thicker than about 1-1/4 inches or made from hard steel, you need a different tool. For most household plumbing, though, the ratcheting cutter is my go-to.
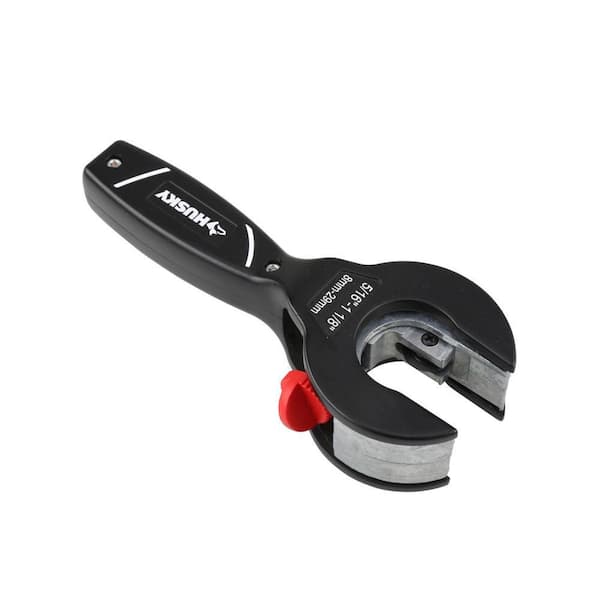
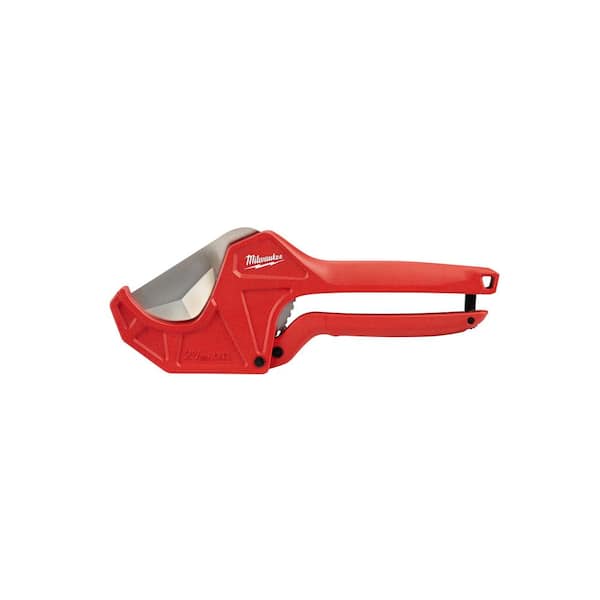
Types Of Ratcheting Pipe Cutters
There are a few styles I’ve tried over the years. Here’s a simple comparison that helped me pick the right one for each job:
| Type | Best For | Pipe Size Range | Notes |
|---|---|---|---|
| Single-Handle Ratcheting | Quick cuts, one hand use | Up to 1-1/4 inch | Great for tight spaces |
| Heavy-Duty Ratcheting | Thicker pipes | Up to 2 inches | Requires more force, both hands |
| Replaceable Blade | Frequent cutting | Up to 1-1/2 inch | Easy maintenance |
I personally use the single-handle style for almost everything at home. It’s lighter and easier to control, which means fewer mistakes.
Tools And Supplies You’ll Need
You don’t need much to get started with a ratcheting pipe cutter. Here’s what I always have on hand:
- Ratcheting pipe cutter (choose the right size for your pipes)
- Marker or pencil for marking your cuts
- Tape measure for accuracy
- Safety glasses—small chips can fly, and eye protection is smart
- Gloves (optional, but they help with grip)
- Sandpaper or de-burring tool for smoothing edges after the cut
Once, I skipped the safety glasses, and a tiny PVC chip hit my eye. I learned quickly—it’s not worth the risk.
Step-by-step: How To Use A Ratcheting Pipe Cutter
After plenty of trial and error, here’s the method that works best for me. Take your time at first, and you’ll get a feel for it.
1. Measure And Mark
I always start by measuring the length I need, using a tape measure. I mark the pipe with a clear, straight line. This step sounds basic, but a crooked mark leads to a crooked cut. I once rushed this part and ended up wasting a full length of pipe.
2. Position The Pipe In The Cutter
Open the cutter wide enough to fit over the pipe. Place the blade right on your mark. Make sure the pipe sits straight in the tool—not at an angle. If the blade isn’t square, your cut won’t be either.
3. Start The Cut
Squeeze the handles gently until the blade bites into the pipe. Don’t try to force it all at once. The ratcheting action means you can squeeze, release, and squeeze again. With each pump, the blade goes deeper.
4. Work Through The Ratchet
This is where the tool shines. Keep pumping the handles, letting the gear do the work. I usually hear a satisfying “click” with each squeeze. Keep the pressure steady but not too hard. Forcing it can crack thin plastic pipes or dull the blade faster.
5. Finish And Inspect The Cut
Once the blade pushes through, pull the tool away. I always check my cut. If there are any rough edges or plastic shavings, I use a bit of sandpaper or a de-burring tool to smooth things out. This step keeps fittings from leaking later.
6. Clean Up
Wipe the pipe end with a dry cloth to remove any dust or chips. Clean cuts fit better and seal tighter. If you’re gluing or fitting the pipe, this small step makes a big difference.
Common Mistakes And How To Avoid Them
I’ve made every mistake you can imagine with these cutters. Here’s what I wish I knew sooner:
- Cutting too fast – If you rush, you might crush the pipe instead of cutting it. Take your time with the ratchet.
- Dull blades – I once kept using the same blade for months. Dull blades slip and leave rough edges. Replace or sharpen the blade often.
- Wrong pipe size – Trying to cut a pipe that’s too big or thick can break the tool. Check the cutter’s max size before you start.
- Not supporting the pipe – If the pipe wobbles, the cut will be uneven. I rest the pipe on a solid surface or hold it firmly.
- Skipping safety gear – Small chips fly out more often than you think. Wear safety glasses every time.
Comparing Ratcheting Pipe Cutters Vs. Other Pipe Cutters
I used to think all pipe cutters were pretty much the same. That’s not true. Here’s a quick comparison based on my experience:
| Tool | Best For | Cut Quality | Speed | Ease of Use |
|---|---|---|---|---|
| Ratcheting Pipe Cutter | PVC, PEX, thin metal | Smooth, clean | Fast | Easy |
| Hacksaw | Any material | Rough, uneven | Slow | Tiring |
| Wheel Pipe Cutter | Copper, steel | Very smooth | Medium | Moderate |
For most home projects, the ratcheting pipe cutter is the winner. It’s faster, and the cuts look professional.
Tips For Getting The Best Results
Over time, I picked up a few tricks that made my work easier:
- Warm up cold pipes – If you’re cutting pipes in a cold garage, they can crack. Let the pipe sit at room temperature for a while first.
- Keep the blade clean – Wipe the blade after each use, especially if cutting sticky PVC. Dirt dulls the edge faster.
- Use slow, steady pressure – Pump the handles gently. The ratchet does the hard work.
- Check blade alignment – If your cuts start looking crooked, the blade might be loose. Tighten it before your next cut.
- Store the cutter dry – Moisture can rust the blade or mechanism.
How To Maintain Your Ratcheting Pipe Cutter
Taking care of the tool makes it last much longer. Here’s what I do:
- Wipe clean after each use – Even a quick wipe prevents build-up.
- Oil the moving parts – A drop of machine oil every few uses keeps the ratchet smooth.
- Sharpen or replace the blade – Some blades are replaceable, others can be sharpened with a small file.
- Store in a dry spot – I keep mine in a toolbox, away from damp basements or garages.
- Check for cracks – Before each use, I look for cracks in the handle or blade. A broken tool is dangerous.
A well-maintained cutter gives better cuts and is much safer.
Real-life Example: Fixing A Leaky Pipe
I remember a weekend when a small leak popped up under my kitchen sink. I found the cracked PVC pipe, measured how much I needed to replace, and grabbed my ratcheting cutter. The tight space under the cabinet would have been impossible with a hacksaw.
With the cutter, I got a perfect, quick cut. After cleaning the edges, I glued the new fitting in. No leaks since then. That was the moment I truly appreciated having the right tool.

Choosing The Right Ratcheting Pipe Cutter
Not all cutters are the same. Here’s what I look for when buying:
- Comfortable grip – Handles with rubber or soft plastic are easier on your hands.
- Replaceable blade – Saves money over time.
- Solid ratchet mechanism – Cheap models can jam or slip.
- Clear size markings – Knowing the pipe range helps avoid mistakes.
Some brands are more reliable. I always check reviews or ask at my local hardware store before buying. Paying a little more up front often means fewer headaches later.
Safety Tips
Even simple tools can be dangerous if you’re not careful. Here’s how I stay safe:
- Always wear safety glasses.
- Keep fingers away from the blade.
- Cut pipes on a stable surface.
- Don’t force the tool if it jams—stop and check for problems.
- Keep out of reach of kids.
A little caution goes a long way. I’ve avoided injuries by taking these steps seriously.
When Not To Use A Ratcheting Pipe Cutter
There are times when another tool is better. I learned this the hard way when I tried to cut a steel pipe and ruined my blade. Use a hacksaw or wheel cutter for:
- Thick steel or iron pipes
- Pipes larger than 2 inches
- Pipes with very hard walls
If you’re not sure, check your cutter’s instructions. If it feels wrong, stop and find a better tool for the job.
Extra Insights Most Beginners Miss
Two things I wish I’d known earlier:
- Blade tension matters – If the blade is too loose, cuts wander. Too tight, and it’s hard to squeeze. Adjust until it feels just right.
- Practice on scrap – Before making your first real cut, practice on leftover pipe. It builds confidence and muscle memory.
I overlooked these details at first, but they made a big difference in my results.
Frequently Asked Questions
What Size Pipes Can A Ratcheting Pipe Cutter Handle?
Most home-use ratcheting cutters work for pipes up to 1-1/4 inches in diameter. Heavy-duty models can go up to 2 inches. Always check the size range on your tool before starting.
Can I Use A Ratcheting Pipe Cutter On Metal Pipes?
Yes, but only on thin-walled metals like copper or aluminum. Don’t use it on thick steel or iron pipes. For those, you need a different cutter, like a wheel cutter or hacksaw.
How Often Should I Replace The Blade?
It depends on how much you use it. If you notice cuts are rough or you need more force, it’s time to replace or sharpen the blade. I check mine every few months.
Do I Need To Clean The Pipe After Cutting?
Yes, always. Use sandpaper or a de-burring tool to smooth rough edges. This prevents leaks and makes fittings easier to install.
Where Can I Learn More About Pipe Cutting Tools?
There are great resources online. For more details and tool comparisons, check out the Wikipedia page on pipe cutters.
If you haven’t used a ratcheting pipe cutter yet, I highly recommend giving it a try. It saved me time, made my cuts cleaner, and turned tough jobs into simple tasks. With a little practice and care, you’ll get professional-looking results every time.
As an Amazon Associate, We earn from qualifying purchases