Refinishing hardwood floors can be a big job. When I moved into my first home, I faced the same question you might have: Can I use a belt sander on hardwood floors? At first, I was unsure. I’d seen videos of professionals using big sanding machines, but all I had was a belt sander from my toolbox. I decided to dig in, try it myself, and learn everything I could—by doing and by making a few mistakes along the way. In this article, I’ll share what I learned, the real pros and cons, and what you should know before you start.
What Is A Belt Sander And How Does It Work?
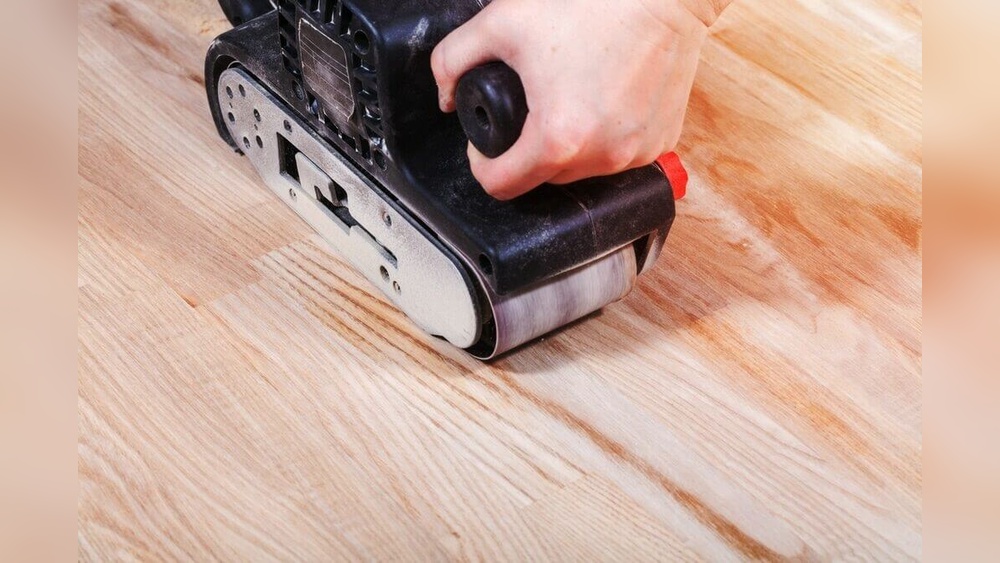
A belt sander is a power tool with a looped belt of sandpaper that moves quickly over two drums. It’s great for removing layers of wood, paint, or finish. Most people use it for smaller woodworking projects, but some try it on large surfaces like floors.
When I first considered using my belt sander on hardwood floors, I thought, “Why not? It sands wood, right? ” What I didn’t realize was that belt sanders are designed for control and detail, not for covering a whole room quickly and evenly.
Can You Use A Belt Sander On Hardwood Floors?
The short answer is yes, you can use a belt sander on hardwood floors—but it’s not always the best tool for the job. I learned this by trying it myself in a small bedroom.
When It Makes Sense
A belt sander can work if:
- The area is small (like a closet or hallway).
- You need to remove tough spots or old finishes.
- The floor isn’t warped or very uneven.
I found it especially useful for sanding edges, corners, and spots where the big machines couldn’t reach.
When It’s A Bad Idea
It’s not ideal if:
- The room is large. You’ll spend hours on your knees.
- The floor is very uneven. It’s hard to keep the finish flat.
- You want a perfectly smooth, professional look.
After a few hours, my arms and back were sore. I realized why pros use drum sanders or floor sanders for the main surface.

Belt Sander Vs. Drum Sander Vs. Orbital Sander
I wanted to know if I was missing out by not renting a bigger sander. Here’s how they compare from my experience:
| Tool | Best For | Speed | Skill Needed | Price (Rental/Day) |
|---|---|---|---|---|
| Belt Sander | Small areas, edges, detail | Slow | Low | $15–$30 |
| Drum Sander | Large, flat floors | Very Fast | High | $50–$70 |
| Orbital Sander | Finish sanding, light jobs | Medium | Medium | $40–$60 |
The belt sander gave me more control, but it took much longer to cover the same area. With a drum sander, the work was faster, but I had to be extra careful not to dig too deep and create grooves.
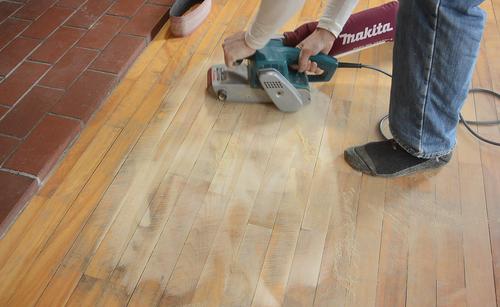
My Step-by-step Experience Using A Belt Sander
If you decide to go ahead, here’s how I tackled my hardwood floor project:
- Cleared the room. I moved all furniture and rugs out and swept up dust and debris.
- Checked for nails. I made sure there were no nails or staples sticking out. Even one nail can tear the sandpaper or damage the tool.
- Chose the right sandpaper. I started with 36-grit for heavy finish removal. Then I moved to 60-grit, 80-grit, and finally 120-grit for a smooth finish.
- Worked in sections. I divided the floor into small areas and sanded along the wood grain. Going against the grain made deep scratches.
- Kept the sander moving. I learned quickly not to let it sit in one spot—otherwise, it would leave dips in the floor.
- Vacuumed often. Dust built up fast. I stopped every 10–15 minutes to vacuum and check my progress.
- Blended edges. I used a hand sander for corners and along the walls.
It took me most of the weekend to do a small room. The results were decent, but not as perfect as a professional job.
Common Mistakes I Made (and How To Avoid Them)
I wish someone had told me these things before I started:
- Pushing too hard. I thought more pressure meant faster sanding. In reality, it just wore out the sandpaper and created uneven spots.
- Not changing sandpaper enough. When the sandpaper gets dull, it doesn’t remove finish well and may burn the wood.
- Missing the grain direction. Sanding across the grain left scratches that took forever to remove.
- Not using a dust mask. The fine dust made me cough and left a layer everywhere. A good dust mask is a must.
Belt Sander Tips For Hardwood Floors
I picked up a few tricks that made the job easier:
- Test first. Try the sander on a closet or small patch to see how it handles.
- Start with coarse grit. Always begin with a rough sandpaper, then go finer. Skipping grits doesn’t save time—it just leaves marks.
- Overlap strokes. Slightly overlap each pass to keep the surface even.
- Go slow and steady. Rushing leads to mistakes you can’t fix easily.
- Use good lighting. Glare from a lamp or sunlight will help you spot uneven areas.

Pros And Cons Of Using A Belt Sander On Hardwood Floors
I learned to weigh the advantages and drawbacks before starting another room.
Pros
- Affordable. If you already own a belt sander, you save on rental costs.
- Good control. Great for detailed work, edges, and repairs.
- Accessible. No need to move heavy machines up stairs.
Cons
- Slow on large areas. Not practical for big rooms.
- Risk of uneven sanding. Easy to make low spots if you’re not careful.
- Physical strain. Kneeling and holding the sander for hours is tiring.
Safety Precautions You Should Take
Safety was something I didn’t think about enough in the beginning. Here’s what I recommend:
- Wear ear protection. Belt sanders are loud, especially in closed rooms.
- Use a dust mask and goggles. Fine dust can harm your lungs and eyes.
- Secure cords. Tripping on the cord can ruin your work or cause injury.
- Check your breaker. Sanding tools can trip older electrical systems.
When To Call A Professional
After my first try, I realized there are times when hiring a pro is the better option. If you have a historic floor, deep damage, or want a flawless look, a floor sanding company has the right tools. They can finish a whole house in a day, and you avoid heavy lifting.
Belt Sander Maintenance For Best Results
I didn’t expect my sander to need much care, but I was wrong. To keep it working well:
- Clean the dust bag after each use. It clogs up quickly.
- Check the belt alignment. If the belt shifts, it can tear or leave marks.
- Replace worn belts. Old belts can slip or break.
- Oil moving parts. Keeps everything running smoothly.
Taking a few minutes to check these things saved me headaches later.
Cost And Time: What To Expect
Here’s how my time and costs stacked up for a small bedroom (about 120 sq. ft.):
| Item | Estimated Cost | Time Needed |
|---|---|---|
| Belt sander (purchase or rental) | $25–$60 | – |
| Sandpaper belts | $10–$30 | – |
| Dust mask/goggles | $10 | – |
| Vacuuming/cleanup | – | 1–2 hours |
| Actual sanding | – | 4–6 hours |
For me, the job was more about time and effort than money. Renting a drum sander would have cost more, but saved me hours.
Non-obvious Insights Most Beginners Miss
There are a couple of things I didn’t realize until I finished:
- The first sanding pass is the most important. If you don’t remove all the old finish, the new stain won’t look even. Don’t rush this step.
- Old floors may have thin wear layers. Some hardwood floors, like engineered wood, only have a thin top layer. Sanding too much can break through to plywood. Always check your floor type first.
- Humidity affects sanding. Damp floors or air can clog sandpaper and make dust stick everywhere. Try to sand when the air is dry.
What I’d Do Differently Next Time
If I had to do it again, I’d rent a drum sander for the main floor and use the belt sander just for corners and touch-ups. This would save time and give a smoother finish.
I’d also get better dust protection. The fine powder gets everywhere, even in rooms you didn’t sand.
If you’re still not sure, check out more about floor sanding methods at Wikipedia.
Frequently Asked Questions
Can I Use A Belt Sander On Engineered Hardwood Floors?
Most engineered floors have a thin hardwood layer. Using a belt sander can sand right through it, exposing the plywood underneath. Always check your floor’s specifications before sanding.
How Long Does It Take To Sand A Room With A Belt Sander?
For a small bedroom, it took me a full weekend—about 6–8 hours total for sanding alone. Larger rooms can take much longer.
What Grit Sandpaper Should I Start With?
I recommend starting with 36- or 40-grit to remove old finish, then moving up to 60-, 80-, and finally 120-grit for a smooth surface.
Do I Need To Remove All Furniture Before Sanding?
Yes, it’s best to clear the room completely. Dust gets everywhere, and it’s easy to bump into things when you’re focused on sanding.
Is It Possible To Get A Professional Finish With A Belt Sander?
It’s possible, but it takes a lot of patience and skill. For most people, it’s hard to get a perfectly flat, even surface with a belt sander alone.
Refinishing my hardwood floor with a belt sander taught me a lot—mostly, where the tool shines and where it falls short. If you’re patient and working in a small area, it can be a useful solution. For whole-house projects or when you want flawless results, renting professional equipment or hiring experts is worth considering.
Whatever you choose, take your time, protect yourself from dust, and enjoy the process. Your floor will thank you.
As an Amazon Associate, We earn from qualifying purchases