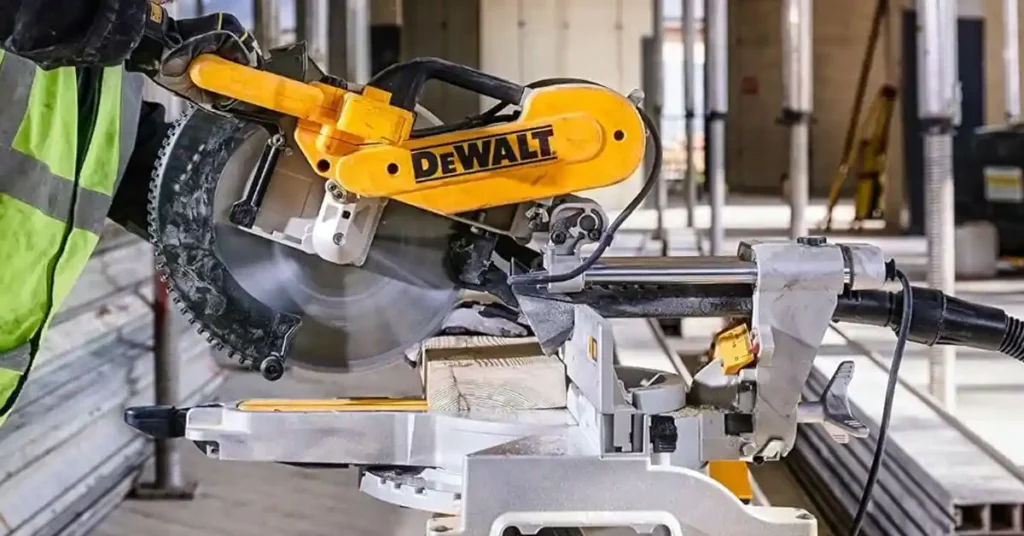
Ever tried cutting trim in a hot, humid Florida garage? Or framing lumber on a freezing Midwest morning? The wrong saw blade can turn a smooth job into a real headache.
I’ve swapped plenty of DeWalt blades over the years, and learning how to change the blade on a DeWalt miter saw the right way makes a big difference. It keeps cuts clean, fast, and accurate. No matter if you’re using DeWalt, Milwaukee, or Craftsman gear, changing blades the right way affects torque, safety, and how long your saw lasts.
Here’s what I found after testing them side by side in real U.S. workshop conditions.

Why Changing Your Miter Saw Blade Matters
When I first learned how to change the blade on my DeWalt miter saw, I had no idea how much difference it would make. Over time, I noticed my cuts getting rough, the motor working harder, and even a faint burning smell. That told me one thing—the blade had dulled.
A dull blade doesn’t just slow you down. It strains the saw and throws off your accuracy. That’s when I learned an important lesson: changing the blade isn’t just about maintenance—it’s about performance and safety too.
A sharp blade keeps your cuts clean, your saw happy, and your hands safe.
What Happens When You Use a Dull Blade?
I’ve seen what a worn-out blade can do, especially when cutting dense hardwood in a humid Florida garage. The motor groans, the wood starts to burn, and you end up forcing the cut instead of guiding it. It’s easy to blame the saw, but most times it’s the blade crying for a change.
A dull blade can pull or bind, leading to kickback or uneven cuts. I once forced a piece of oak through a tired blade and ended up with scorch marks and a rough edge that took forever to sand smooth. That’s wasted time and effort.
From a safety view, OSHA recommends checking your cutting tools often for wear or damage. A sharp, clean blade puts less strain on both the tool and your hands.
A dull blade burns wood, strains the motor, and risks kickback—keep it sharp for smooth, safe cuts.
How Often Should You Change a Miter Saw Blade?
How often you swap blades depends on what you’re cutting and how often you use the saw. When I’m trimming soft pine or PVC, a blade can last weeks. But when I’m cutting hardwoods or deck boards, I replace or sharpen it after 50 to 100 hours of work.
One simple trick: watch for burn marks or extra resistance. If you hear the motor bog down or feel the blade slowing, it’s time. Even top-tier carbide blades dull faster on tough materials or in cold, dry shop air—something I’ve noticed during Midwest winters.
Changing the blade before it’s fully dull keeps your cuts clean and your motor strong. It’s like changing oil in your truck—you do it before problems start.
Replace or sharpen your miter saw blade every 50–120 hours, or sooner if you see burns, slower cuts, or extra vibration.
Before You Start — What to Know About the DeWalt Arbor System
When I first learned how to change the blade on a DeWalt miter saw, the part that confused me most wasn’t the guard or the wrench—it was the arbor system. It’s small but important. It holds the blade tight and makes sure it spins true. Once I understood it, blade swaps became fast and easy.
What Is an Arbor and Why It Matters
Think of the arbor as the saw’s backbone. It’s the metal shaft that connects the motor to the blade. When you power up, the arbor transfers torque so the blade spins smoothly through the cut.
Your DeWalt saw uses two clamp washers—one fixed inside and one removable outside—plus an arbor bolt that locks everything in place. These parts need to stay clean and flat for balance. Even a bit of sawdust behind a washer can cause wobble.
If your blade “walks” or vibrates, that’s often dust buildup on the arbor. A quick wipe with a dry cloth or brush before reassembly fixes it fast.
A clean arbor keeps your blade steady, your cuts smooth, and your work safe.
Why DeWalt Uses a Reverse (Left-Hand) Thread
Here’s a detail I wish I’d known earlier: DeWalt uses a reverse-threaded arbor bolt. To loosen it, you turn clockwise. To tighten it, you turn counter-clockwise—the opposite of what most of us expect.
The reason is simple physics. Since the blade spins clockwise when cutting, a normal (right-hand) bolt would loosen over time. DeWalt’s left-hand thread design uses that same rotation to keep the bolt tight, even under load.
The first time I changed my blade, I turned the bolt the wrong way for five minutes straight before realizing the trick. Once you know, it’s easy—and it saves frustration and stripped bolts.
If you ever forget, ask: “Which way do you turn the bolt on a DeWalt miter saw?” The answer: right to loosen, left to tighten.
DeWalt’s reverse-thread design keeps the blade secure—remember, right to loosen, left to tighten.
Safety First — PPE and Power Isolation Are Non-Negotiable
Whenever I show someone how to change the blade on a DeWalt miter saw, I start with one rule — unplug it and gear up. I’ve seen too many close calls from people who skip this step. Power isolation and proper PPE aren’t optional. They’re the reason you finish the day with all your fingers intact.
What Safety Gear Do You Need?
Before I touch the saw, I grab my ANSI-rated safety glasses, heavy gloves, and hearing protection. It takes seconds and prevents real pain later. Even when the saw is off, those sharp carbide teeth can cut skin fast.
In dusty shops, especially when cutting MDF or old treated lumber, I wear a dust mask too. Sawdust lingers in the air, and OSHA rules (like 1910.94) remind us it’s not safe to breathe for long.
I learned that lesson in a small Midwest garage with poor ventilation. The air would fill with fine dust, and I’d be coughing for hours. Now, I never start a single cut without proper gear.
Eye, hand, and breathing protection should be automatic. It’s not overkill — it’s smart habit.
How to Safely Power Down a Miter Saw
Here’s a mistake I made once — I forgot to unplug my corded DeWalt before changing the blade. I brushed the trigger and nearly got hurt. Since then, I follow one simple routine:
- If it’s corded, unplug it completely — don’t just flip the switch.
- If it’s cordless, remove the battery and set it aside.
- Then press the trigger once to confirm it’s fully dead.
It sounds basic, but it’s the difference between a safe job and a trip to the ER. I’ve heard the same from pros on busy job sites — one quick slip can mean serious injury. Whether you’re in a garage or on-site, kill the power first. Always.
Power isolation is step one before changing any blade — no exceptions.
Setting Up Your Workspace
A little prep makes a big difference. Before starting, I clear the bench and lock the miter saw down. DeWalt’s lockdown pin keeps the head secure while you work — something I once forgot to use. The head dropped right as I reached for the arbor bolt. Not fun.
Use a sturdy stand or stable workbench with good lighting. That keeps the saw steady during the swap. I also lay out my tools — the blade wrench, Torx driver, and new blade — so they’re close by. It saves time and keeps your hands away from sharp edges.
When I worked in cold Michigan winters, I used to warm my gloves before grabbing metal parts. Cold tools and numb fingers are never a good mix when handling blades.
A clean, stable workspace and organized tools make blade changes faster and safer.
Tools You’ll Need to Change a DeWalt Miter Saw Blade
After years of swapping blades on my DeWalt miter saw, I’ve learned one thing — the right tools make the job faster and safer. I can’t count how many times I’ve had to stop mid-job hunting for a missing wrench or driver. Now, I keep a small kit just for blade changes. It saves time, stress, and a few scraped knuckles.
Here’s what I use every time — and why each tool matters:
Blade Wrench (13mm or 1/2”)
DeWalt usually includes a blade wrench with the saw. It’s often clipped on the back or stored under the handle. I’ve lost mine more than once, only to find it weeks later. This small wrench loosens and tightens the arbor bolt perfectly and keeps the bolt edges from rounding.
Make sure the wrench seats fully before you apply pressure. A snug fit prevents slips that can bruise your knuckles fast.
Keep your blade wrench handy — it’s small, easy to lose, and essential for safe bolt removal.
Torx Driver (T30 or T40)
Models like the DWS779 and DWS780 use Torx screws to hold the blade guard. The first time I changed my DWS779 blade, I tried a Phillips screwdriver and stripped the screw head. Lesson learned. A proper T30 or T40 Torx driver makes guard removal quick and damage-free.
In cold U.S. climates, like my Michigan shop, metal screws can stiffen up. A small tap or gentle twist helps free them without stripping.
Use a Torx driver for guard screws — it’s faster, safer, and keeps screw heads intact.
Phillips #2 Screwdriver (Older Models)
If you’re using an older DeWalt saw, like the DW713 or DW715, you might see Phillips screws instead of Torx. A #2 Phillips screwdriver works for most of them. I’ve had one in my toolbox since my first miter saw back in the early 2000s — it still works like a charm.
Check your screw type first — newer DeWalt saws use Torx, but older ones often need a Phillips driver.
Socket Wrench (13mm–15/16”)
When I lost my DeWalt wrench during a Texas remodel, a socket wrench saved the day. A 13mm or 15/16” socket fits most arbor bolts perfectly. It also gives better leverage if the bolt is tight or stuck. I now prefer it in cold weather — that longer handle helps a lot.
A socket wrench is a great backup when the factory wrench goes missing — it gives better grip and torque.
Rubber Mallet
Sometimes the lower guard sticks from resin or fine sawdust. When that happens, I give it a light tap with a rubber mallet. I always use a small wood block between the mallet and saw housing. Never hit metal directly — I cracked a guard hinge once learning that lesson.
A soft mallet helps free stuck guards safely — never force metal parts with a hammer.
Brass or Nylon Brush
Before installing a new blade, I always clean the arbor, washers, and guard area with a brass or nylon brush. In humid spots like Florida, sawdust and resin can bake onto metal fast. If you skip cleaning, the blade won’t sit flat. A quick brush keeps everything clean and balanced.
A clean arbor and washer mean smoother cuts and less vibration — never skip the cleanup step.
Step-by-Step — How to Change Blade on DeWalt Miter Saw
After years of swapping blades on different DeWalt saws, I’ve built a simple routine that keeps me safe and saves time. The first few times I tried, I rushed. I dropped washers, lost screws, and even forgot to tighten the guard once. Now, I slow down and follow the same order every time. Here’s exactly how I do it — step by step.
Step 1: Access the Arbor Assembly
Raise the saw arm and pull the lower guard up and back. That gives you a clear view of the arbor area — where the blade, washers, and bolt meet. Most DeWalt saws use a small linkage screw to hold the guard. On my DWS780, it’s a Torx T30 screw.
Loosen that screw gently and swing the guard aside. Then remove the small metal plate covering the arbor. With that off, you’ll see everything clearly and have space to work.
Open the guard and remove the cover before touching the blade. It keeps small parts from dropping or getting lost.
Step 2: Lock the Spindle
Next, press the spindle lock button — the small round button on the motor housing, usually black or gray. Slowly rotate the blade by hand until it clicks and stops. That means it’s locked.
This step is crucial. Without locking the spindle, the bolt and blade spin together, and you’ll just fight the wrench. In cold shops, like my Michigan garage in winter, I wear thinner gloves for better grip when turning the blade.
Always lock the spindle before loosening the bolt. It keeps the blade steady and your hands safe.
Step 3: Loosen the Arbor Bolt
This part trips a lot of people up. DeWalt uses a reverse (left-hand) thread on the arbor bolt. That means you turn it clockwise to loosen. The first time I did this, I turned it the wrong way for five minutes before realizing my mistake.
Fit your 13mm wrench on the bolt, press the spindle lock again, and turn right (clockwise) until it breaks loose. Once it moves, spin it off by hand and remove the outer washer.
If it’s tight from humidity or resin buildup — common in southern shops — give the wrench a light tap with a rubber mallet to break it free.
Remember — right to loosen, left to tighten. The reverse thread keeps it secure during use.
Step 4: Remove the Old Blade
With the bolt and washer off, lift the blade straight up and out using both hands. Always wear gloves — those carbide teeth can cut skin even when dull.
Before installing the new blade, check the arbor and inner washer for resin or dust. A quick brush or wipe with solvent works great. Once, I skipped this and ended up with a slight wobble that ruined a clean trim cut.
Clean the arbor and washers before installing the new blade. Even a little dust can cause wobble or uneven cuts.
Step 5: Install the New Blade
Now comes the fun part. Check that the new blade matches your saw — 10” or 12” diameter with a 5/8” arbor hole. If it has a 1” hole, use an adapter ring.
Place the blade on the arbor with the teeth facing toward the fence — the same direction it cuts when spinning. Reinstall the outer washer, then thread the arbor bolt counter-clockwise (left) to tighten.
Snug it firmly but don’t overdo it. The reverse thread keeps it tight under load.
Make sure the teeth face the fence and tighten the bolt counter-clockwise.
Step 6: Test and Verify
Before plugging in, spin the blade by hand a few times. It should move freely with no scraping or wobble. Then reattach the guard and cover plate.
Once everything looks good, plug in the saw and run a short test spin. Just tap the trigger — listen for smooth sound and steady motion. If it runs quiet and clean, the install’s perfect.
In dry climates, like Arizona, I sometimes use a touch of DriCote or paste wax to keep dust from sticking — optional, but handy.
Always test the blade before cutting. A smooth, quiet spin means you did it right.
Troubleshooting — When the Bolt or Blade Won’t Budge
Even after years of changing blades, I still hit moments when the bolt just won’t move. It often happens after long cutting sessions in humid weather or when resin builds up on the threads. If your bolt or blade won’t budge, don’t panic — a few simple tricks can help.
What to Do If the Arbor Bolt Is Stuck
I’ve had plenty of stubborn bolts, especially after cutting pressure-treated wood in Florida’s humidity. When that happens, I grab a longer wrench or a breaker bar. The extra length gives me more leverage without forcing things too hard.
If the bolt still won’t move, I ask a helper to press the spindle lock while I apply slow, steady pressure on the wrench. Quick jerks don’t help — smooth pressure does. I once snapped a cheap wrench by rushing.
If the bolt feels seized, I add a few drops of penetrating oil and wait 10–15 minutes. That loosens resin or corrosion. In dry places like Arizona, it’s usually resin, not rust. Once the bolt breaks free, I wipe it clean before reinstalling.
Use steady pressure and patience. Forcing a stuck bolt often causes more damage than delay.
Blade Wobble After Replacement?
If you see the blade wobble after a swap, don’t worry — it’s often an easy fix. First, check the washers. Even a bit of dust or resin between the washer and blade can throw it off balance. I learned that during a cabinet job in Ohio when my new blade started shaking. A quick cleaning solved it.
Next, make sure your adapter ring fits tight. A loose ring or worn washer can cause vibration at high speed. I also use a square to check that the blade is at 90° to the fence. Sometimes a tiny angle shift looks like wobble.
If everything checks out and the blade still shakes, it might be warped — which can happen if it got damp or overheated.
Blade wobble usually means dirt, poor seating, or misalignment — not a broken saw. Clean and realign before cutting.
Blade Maintenance — Keeping Cuts Clean and Accurate
Once the new blade is on, keeping it clean is key. I used to think new blades stayed sharp forever — until I saw how fast resin builds up after a few days of cutting pine trim. A quick clean now saves time and money later.
How to Clean a Pitch- or Resin-Covered Blade
When the teeth get sticky or show burn marks, I take the blade off and soak it. I use a shallow tray with a citrus cleaner or Simple Green — both work well and won’t harm carbide teeth. After 10–15 minutes, I scrub gently with a brass brush.
Then I rinse with warm water, dry the blade, and add a thin coat of paste wax or DriCote. That keeps resin from sticking again — especially in humid areas near the Gulf Coast.
Clean blades cut smoother and last longer. A short soak and a quick scrub work wonders.
When to Sharpen or Replace a Blade
Carbide blades dull slowly, not all at once. After about 10–15 hours of cutting hardwood, I know it’s time to sharpen. Softer woods or PVC let you go a bit longer.
I check the teeth under good light. If any are chipped, cracked, or missing, I replace the blade right away. A broken tooth at full spin isn’t worth the risk. I keep a few spares — usually DeWalt, Diablo, or Freud — ready to go.
In colder states, I also store my blades in a dry cabinet to avoid rust during winter. That small habit keeps them sharp and ready.
Sharpen after 10–15 hours of cutting and replace damaged blades fast. A few spares save time and keep your cuts clean.
Pro Tips for Long-Term Saw Accuracy
After changing dozens of blades on my DeWalt miter saws, I’ve learned that accuracy doesn’t vanish overnight — it drifts slowly. Keeping your saw clean and tight helps every cut stay true. These small habits have saved me many times.
Keep the Arbor Assembly Clean
Resin builds up fast when cutting pine or pressure-treated wood, especially in warm, humid shops. That sticky film can make your blade wobble and throw off your alignment.
Now, every time I change a blade, I spend one extra minute cleaning the arbor, washers, and bolt. A brass brush or even an old toothbrush with a drop of cleaner works great. You can feel how much smoother the blade spins afterward.
In dusty Midwest shops, I also blow out the motor housing with compressed air to keep fine sawdust from settling inside.
Clean the arbor and washers each time you swap blades. Even a little resin can ruin a smooth cut.
Check Fence and Bevel Alignment
Even top-tier miter saws drift over time, especially if you move them from site to site. I learned that lesson on a remodel job in Ohio when my cuts started missing by just a hair. The fence was off by one degree.
Once a month, I check both the fence and bevel with a square or my DeWalt gauge. If anything’s off, I recalibrate before starting the next project. It takes only a few minutes but keeps every angle crisp and safe.
Cold weather can also shift metal slightly, so winter is a good time for an extra check.
Make fence and bevel checks part of your monthly habit. It keeps cuts clean and angles true.
Store Blades Properly
I used to stack spare blades on a shelf. After one wet Florida summer, I noticed rust spots forming on my best blade. Now, I hang them vertically on peg hooks or keep them in padded cases. The teeth stay safe, and the metal stays dry.
If you live near the coast, toss a silica gel pack in your case. It’s cheap and keeps moisture away. In cold states, store blades indoors — garages can trap moisture as temperatures change.
Store blades dry, upright, and protected. Proper storage keeps them sharp for years.
FAQs — How to Change Blade on DeWalt Miter Saw
These are the questions I hear most often about changing a DeWalt miter saw blade. They’re short, clear, and perfect for quick look-ups or voice search.
Which way do I loosen a DeWalt miter saw blade bolt?
Turn it clockwise to loosen. DeWalt uses a reverse-thread bolt that stays tight while cutting. Remember: right to loosen, left to tighten.
Can I use a 10-inch blade on a 12-inch DeWalt saw?
No. Always match the blade size and arbor hole to your saw’s rating. The wrong size reduces depth and can be unsafe.
Do I need to oil my DeWalt miter saw?
Not usually. Keep joints clean and dry. Never oil the arbor or blade area. A light silicone spray on moving parts is enough.
Why is my miter saw smoking after a blade change?
It’s often resin buildup or an over-tightened bolt. Clean the blade, loosen the bolt slightly, and test again.
Conclusion — Confidence in Every Cut
Changing the blade on a DeWalt miter saw isn’t just routine — it’s what keeps your cuts sharp and clean. A well-maintained saw feels smoother, sounds better, and delivers pro results every time.
Whether you’re trimming crown in a humid Florida shop or cutting deck boards in a dry Arizona backyard, one rule stays true: slow down, stay safe, and respect the tool.
Each blade change is a reset for accuracy. Keep the arbor clean, align the fence, and store your blades right. Do that, and your DeWalt will reward you with years of smooth, confident cuts.
A sharp blade, a clean arbor, and steady care — that’s the real secret to safe, accurate woodworking.
As an Amazon Associate, We earn from qualifying purchases