It was a nice bright Sunday. I woke up to drink my hot tea. I like to walk on clean wood floors. But my floor was full of bread crumbs.
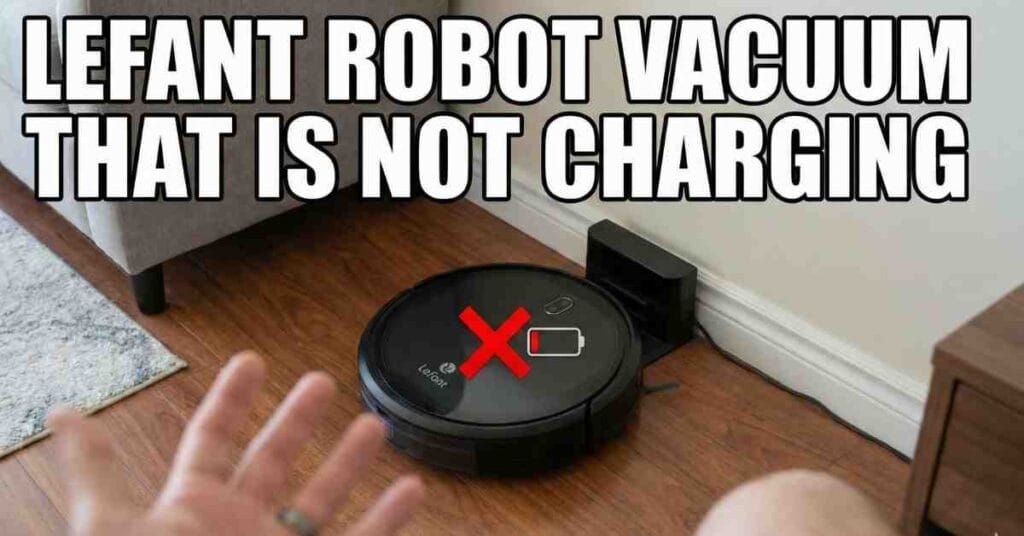
My pet dog drops hair all day long. I looked in the back corner of the room. My Lefant robot vacuum sat there dead and cold. It did not go home to charge its cell.
I picked up the small black bot. It was cold to the touch and turned off. I pressed the top start button with my thumb. The bot did not wake up or beep at all.

Why the Lefant Will Not Charge
Many things can stop your bot from getting power. Please do not fret or worry too much. Most of the time the fix is very quick and easy. You do not need hard tools to fix it.
The big issue is dirt on the flat metal pads. Next is a bad wall plug in your house. Sometimes the black cord just falls right out. Very rarely the power cell inside is dead and gone.
I fix tools and test gear on my desk all day. I love to find out why things break down. I will show you how to test your bot step by step. We will start with the fast and easy tests first.
Step One Check the Metal Pads
This is the most common fix in the whole world. I see this a lot on my home work bench. Your bot drives all over your rug and floors all day. It picks up fine dust and wet thick dirt.
This dark dirt sticks to the base of the machine. There are two flat metal pads on the bottom. The home dock has two round metal pins as well. These parts must touch each other fully to work right.
Dirt acts just like a thick brick wall. It blocks the fast flow of wall power. The bot thinks it is on the home dock safely. But it takes in zero power from the pins.
How to Clean the Metal Pads
I went to my sink to get a soft dry cloth. I sat on my couch with the dead bot. I flipped the bot upside down on my lap. I made sure to hold it very safe and still.
I wiped the two metal pads real hard. I took off all the black thick grime. Next I wiped the pins on the home base. Sometimes the dirt is very sticky and hard to wipe.
If the dirt is stuck fast use a soft cotton swab. Dip the swab in a few drops of rubbing scrub. Rub the metal parts clean until they shine bright. Let it dry out for one full minute before you test.
Step Two Check the Power Cord
Sometimes the bot is in great shape to run. The real bad thing is your house wall plug. People trip over loose black cords a whole lot. Cats like to bite on soft thin wires too.
The cord might be loose from the wall base. First you should test the real wall plug hole. I use a small desk lamp for this fast test. Plug the lamp in and turn it on to check.
If the lamp glows bright the plug works fine. If the lamp stays dark check your main house box. Next look at the back part of the home base. Make sure the cord is pushed in deep and tight.
Look for the Dock Light
Most charge bases have a small clear light. Look for a green or blue dot on the top. This light tells you the dock has good hot power. It means the black cord works great right now.
If you see no bright light your cord might be bad. You might need to buy a new cord to fix it. Always check this small light first thing. It saves you a lot of time and hard work.
Step Three Do the Wiggle Test
Your bot is smart most of the long day. But it can still make a bad park job. It drives up but stops way too soon. It might sit at a weird bad angle.
The flat pads do not touch the round pins. This means no power flows down to the bot. I always do a quick hands on wiggle test. Pick up the bot with both of your hands.
How to Park the Bot Well
Put it on the base by hand with care. Push it back to the wall of the dock. Give it a gentle shake left and then right. Move it just a tiny bit on the floor.
You will feel it click right in place. You will hear a loud happy beep sound. The light on top will blink pink or blue. This means it is taking a charge very well.
Step Four Check the Main Switch
All these smart bots have a main power switch. It is a red switch on the right side. This switch must be turned to the on spot. If it is off it will not charge up at all.
Sometimes this side switch gets bumped by mistake. I kicked mine once with my toe by pure chance. A kid might play with the switch for fun too. Check the side to make sure it is on.
Flip the switch off for a few short seconds. Then flip it back to the on spot right away. Put the bot back on the home base dock. Wait for the happy beep sound to ring out.
Step Five Look at the Power Cell Life
Power cells do not last for all of time. They wear out after a lot of hard use. If you run your bot every day it gets weak. A dead cell will not hold a charge for long.
After two or three years it might die out. A dead power cell acts like a broken dock. But the cell is just too old to do work. You can buy a new one online very fast.
I like to track how old my house tools are. It helps me know when to buy new parts. Let me show you a quick nice data chart. It shows you what to expect from your parts.
Power Cell Data and Facts
Here is a quick clear table of cell facts. It shows common life spans for key bot parts. Use this data to check your own floor bot.
| Part Name | Life Span | Sign of Bad Part |
| Power Cell | Two to three years | Short run times |
| Wire Plug | Five plus years | Loose fit in base |
| Charge Time | Four to five hours | Never gets to full |
If your bot is very old just buy a new cell. It is cheap and simple to swap out at home. Your bot will run like brand new once again. It is a smart choice to make today.
Step Six Do a Hard Reset
Smart tools get stuck in deep thought a lot. A hard reset clears the bot brain out well. It wipes out all the bad soft code bugs. It starts fresh and clean for you to use.
Turn the side red switch to the off side. Leave the bot off for five full long minutes. Do not rush this step at all today. I go get a cold drink while I wait it out.
Steps to Clear the Bot Brain
Come back and turn the switch to the on side. Put the bot flat on the home charge dock. This wakes up the whole smart chip right away. It drops all the fake charge faults at once.
This is just like a phone reboot step. It takes care of strange weird software traps. The bot talks to the dock with no more bugs. You will see the charge light turn on fast.
Step Seven Test with a Fluke Meter
I love to test things with my Fluke meter. I fix electric tools on my desk all day long. A good meter finds real power faults super fast. You can check if the dock sends out juice.
Set your test tool to read direct current volts. Touch the red tip to one metal round pin. Touch the black tip to the other round pin. Read the clear screen on your test tool.
How to Read the Volts
It should say near nineteen volts on the screen. This means the dock works great for your bot. If the screen says zero the dock is dead. You must buy a new home dock to fix this.
Testing with a tool takes the guess work out. You know right away what part has failed. It saves you from buying parts you do not need. I test all my bad tools this exact way.
Step Eight Clean the Wheels and Brush
Sometimes the bot takes a full good charge. But it dies dead in ten short fast minutes. It acts like it did not charge at all today. This is a common trap for new bot users.
Hair gets tied up tight in the main brush. Yarn wraps tight on the two big side wheels. The bot motor has to work much too hard. This drains the power cell real fast to zero.
How to Cut Free the Trapped Hair
Take the main brush out of the bot base. Use sharp snips to cut all the trapped long hair. Pull the hair away and throw it in the trash. Spin the side wheels with your bare hand.
They must spin with no hard stops or grabs. If they feel stiff pull out the dark dirt. A clean bot uses less power to drive around. It will clean your rug for a full hour.
Step Nine Look for a Good Home Spot
Where you put the dock is a big deal. The bot uses a clear beam to find its home. If the dock is hid the bot gets lost fast. It drives round until it dies flat on the rug.
Put the base on a hard clean flat floor. Do not put it on a thick soft rug. Keep the wall area very clear of junk. Do not put chairs close to the base at all.
Keep the Zone Clear of Junk
Leave three feet of free space on the left. Leave three feet of free space on the right. Leave four feet of clear open space in front. This huge space helps the bot see the beam.
It will drive straight in and park right. It will hit the pins on the first try. A bad spot means it will bump the walls. Then it gives up and goes to sleep dead.
Step Ten Open the Thin Plastic Case
I like to open tools to see the guts. If all steps fail look at the inside wires. But please stop and think first before you pry. Opening the bot might void your free long guarantee.
Get a small cross head screw tool to start. Put the bot upside down on a soft bath towel. Take out the small screws on the flat base. Lift the thin plastic lid up and off the bot.
Check the Wire Plug Inside
Look at the green or blue square power pack. There is a small plug with thin red wires. Make sure this plug is pushed in deep and tight. Give it a firm hard push with your thumb.
Driving on thick rugs makes this plug shake loose. A loose plug means the cell gets no charge flow. Put the lid back on and screw it down tight. Test the bot on the dock one last time.
My Final Thoughts on Bot Care
Taking care of your Lefant bot is super easy. It just takes a few short minutes a month. Wipe down the bot with a clean dry cloth. Keep the two flat metal pads very clean.
Empty the dirt cup out after each full run. Keep the dock in a wide clear open space. This simple care stops most bad charge faults. Your smart bot will live a long happy life.
My wood floor is clean and nice again today. My bot charges great on its home floor dock. It was just dirty pads that sad Sunday morn. I wiped them off and it sprang right to life.
As an Amazon Associate, We earn from qualifying purchases