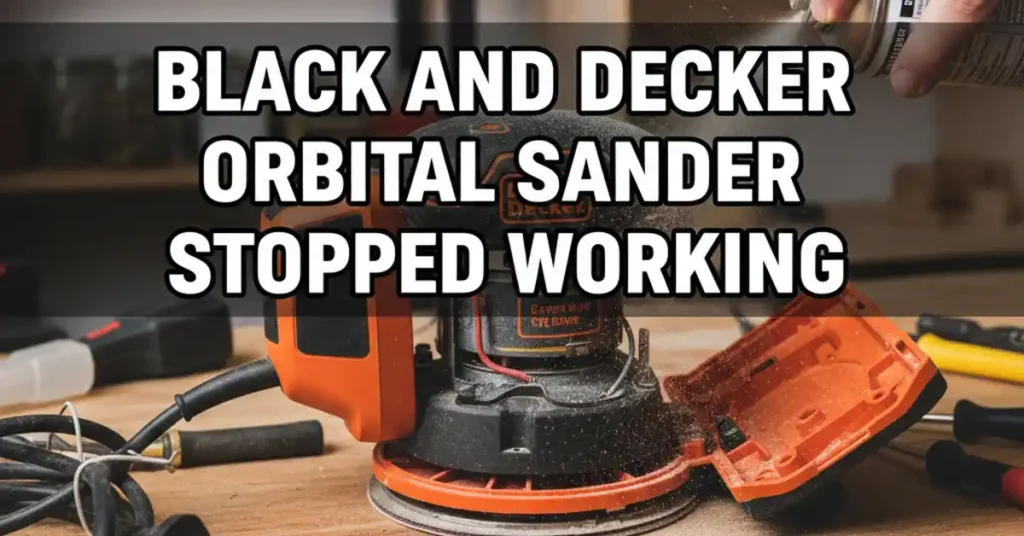
It was a hot Tuesday in my dusty garage. I was sanding a small pine bench for my porch. The sun was bright, and the wood was smooth. Suddenly, my Black and Decker orbital sander stopped working without a sound. It did not smoke or make a noise. It just died while I was mid-stroke.

I felt a wave of stress hit me. I had to finish this bench before sunset. Instead of getting mad, I sat down with a cold drink. I looked at the tool and thought about why it quit. Most tool problems are simple if you look closely. I decided to find the fix right then and there.
Why Orbital Sanders Quit Mid-Job
I have used many tools over the years. I know that dust is the main killer of gear. Sanders live in a cloud of fine wood flour. This dust gets into the tiny gaps of the motor. It can stop the flow of power or jam the moving parts.

Common Failure Points
| Part | What it does | Why it fails |
| Power Cord | Carries electricity | Stress and constant bending |
| Power Switch | Turns it on and off | Gets clogged with fine dust |
| Carbon Brushes | Moves power to motor | They wear down over time |
| Internal Wires | Connects parts | Vibration shakes them loose |
Testing the Power Cord First
The first thing I did was check the wall plug. I plugged in my shop fan to see if the power was on. The fan started right up, so the outlet was fine. I then looked at the cord of the sander for any cracks. I saw a small kink near the base of the handle.

I turned the sander switch to the “on” position. I gently wiggled the cord near that kink. For a split second, the motor kicked back to life. I knew right then that the wire inside was snapped. This happens because the tool vibrates so much during a job.
I cut out the bad part of the wire and put on a new plug. It took me less than ten minutes to do. If your tool cuts in and out, check the cord first. It is the most common fix for any power tool. A quick wiggle test can save you a lot of time and money.
Cleaning a Dusty Power Switch
If your cord is fine, the switch is the next spot to check. My workshop is always full of fine dust from my projects. This dust acts like a wall inside the power switch. It stops the metal parts from making a good connection.
I noticed my power button felt soft and did not click. I took a can of air and blew it into the switch gaps. A huge cloud of gray dust puffed out into the air. I kept blowing until the button felt crisp and clicked again.
Sometimes you need to use a special spray for electronics. This liquid dissolves the grime and dries very fast. Once the switch was clean, I plugged it in and it ran great. Keeping your switch clean is the best way to avoid a dead tool.
Switch Health Check
| Symptom | Problem | Action |
| No click | Dust buildup | Use compressed air |
| Sticking | Sticky residue | Use contact cleaner |
| Loose | Broken spring | Replace the switch |
Replacing the Carbon Brushes
After I cleaned the switch, I checked the motor brushes. These are two small blocks of black carbon inside the case. They rub against the spinning motor to pass power. Over time, they wear down like a pencil eraser.
I opened the plastic shell with my screwdriver. I found the two small springs that hold the brushes. Mine were very short and looked burnt on the ends. When they get too short, they can no longer reach the motor.
I bought a new pair of brushes for just a few dollars. I popped them in and put the case back together. When I turned it on, the motor sounded strong and fast. It felt like a brand new tool in my hand. It is a simple fix that anyone can do at home.
Solving the Humming Motor Issue
Sometimes the sander makes a low sound but will not spin. This happened to me once with an old unit I found. I turned it on and just heard a deep hum. This usually means the motor is stuck or the bearings are dry.
Wood sap and dust can turn into a thick glue. This glue jams the pad and stops it from moving. I unplugged the tool and tried to spin the pad by hand. It was very stiff and felt like it was full of sand.
I took the bottom plate off to see the bearing. I cleaned the area with a rag and a bit of oil. After a few spins, the pad moved freely again. I plugged it in and the hum turned into a smooth whirr. A little oil goes a long way for your power tools.
Hearing the Difference
- Silence: Usually means a break in the electrical path.
- Humming: Usually means a mechanical jam in the pad.
- Sparking: Usually means the carbon brushes are very low.
The Importance of Solder Joints
Since I do a lot of DIY, I have a soldering iron. When I opened my sander, I looked at all the wires. One thin white wire had fallen off its metal tab. The vibration of the tool had shaken it loose over time.
I used my iron to melt a bit of metal onto the wire. I stuck it back onto the tab and let it cool. I gave it a small tug to make sure it was on tight. This is a very common issue with cheaper power tools.
A loose wire is an easy fix if you are careful. You just need to see where the wire came from. Usually, you can see a small bit of old solder on the tab. Once it was fixed, the sander worked perfectly for the rest of my project.
How to Maintain Your Sander
I want my tools to last for many years. I do not want to spend money on new gear every month. I have a simple plan to keep my sander in top shape. It only takes a few minutes after each project is done.
My Monthly Maintenance Routine
- Blow it out: Use air to clean the motor vents.
- Check the pad: Keep the hook-and-loop part free of dust.
- Look at the cord: Check for any cuts or burns.
- Listen close: Stop if you hear any new or odd sounds.
When to Call it Quits
I love to fix my own gear, but some tools are gone. If you see smoke or smell something burning, stop at once. This means the motor coils have melted inside the unit. This is a major failure that is hard to fix.
If the motor smells like a fire, it is time for a new one. Fixing a burnt motor costs more than a new sander. But for most issues, it is just a dirty switch or a bad wire. Always try the simple fixes before you give up.
My Final Thoughts on Tool Repair
Fixing my Black and Decker orbital sander felt great. I saved money and I learned how my tool works. It is a good feeling to fix something with your own two hands. It makes you a better maker and saves you a trip to the store.
Most tools are just a motor, a cord, and a switch. Do not be afraid to open them up and look. You might find a simple fix that takes five minutes. Now, my pine bench is smooth and ready for paint.
FAQs: Black and decker orbital sander stopped working
Why does my Black and Decker orbital sander feel hot during use?
Dust often clogs the vents and stops the cool air. Clean the vents with an air can to keep the motor cool and safe. This helps the tool last much longer in a hot garage.
Can I fix a power cord that has a break near the handle?
Yes, you can cut the bad wire and add a new plug. This is a common fix for tools that lose power when they move. It is a cheap way to save your favorite gear.
How often should I check the carbon brushes in my motor?
Check them if you see sparks or if the motor sounds weak. Most DIY users should look inside once a year. New brushes give your sander the power it had on day one.
What should I do if my sander makes a loud humming noise?
A hum usually means the pad is stuck or the bearing is dry. Unplug the tool and try to spin the pad by hand. A drop of oil often solves this mechanical jam quickly.
Is it safe to use my orbital sander in a cold workshop?
Cold air can make the grease inside thick and stiff. Run the sander for a minute without touching wood to warm it up. This protects the gears and the motor from extra stress.
As an Amazon Associate, We earn from qualifying purchases