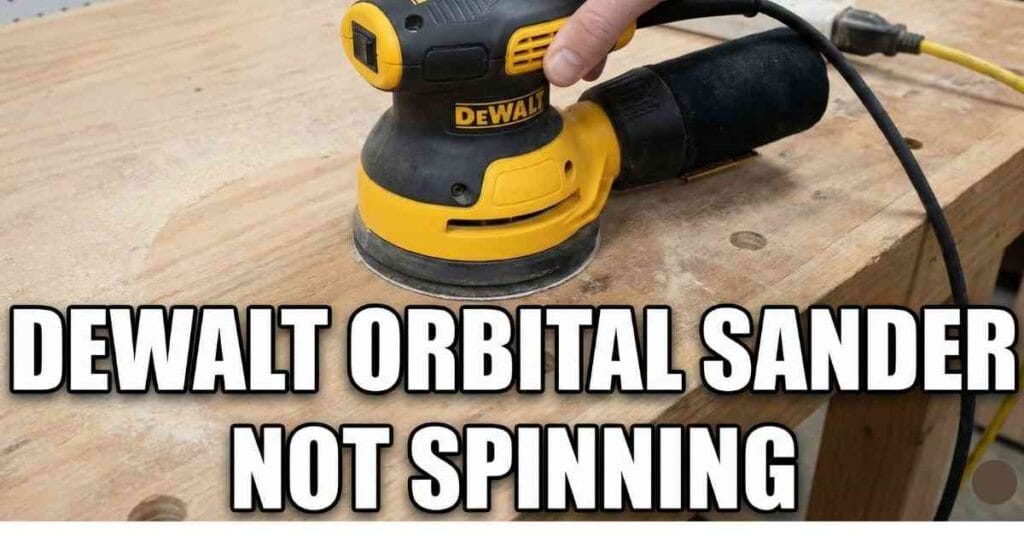
It was a sunny Saturday afternoon in my garage. I was working on a nice oak coffee table and felt ready to finish the top. I grabbed my yellow DeWalt orbital sander and plugged it in to get started. I hit the switch and the motor buzzed to life just like normal.
That is when the trouble started for me. The motor was humming and the tool vibrated in my hand, but the pad barely moved. It just sat there on the wood without spinning. When I lifted it up, it spun like crazy, but it stopped dead when I put it back down.

I felt a knot form in my stomach because I thought my tool was dead. I worried I had to spend money on a new one, which was not in my budget. I unplugged the cord and decided to take a look before I gave up. It turns out this is a common problem with a cheap fix.
The Panic Moment: Is the Motor Burned Out?
My first thought was that the motor had burned out completely. I smelled the air near the vents, but there was no burning smell at all. That was a good sign that the motor was still safe.
If the motor was dead, the tool would be silent or it would smoke. Mine was loud and shaking, which meant power was getting in. The engine was running fine, so the problem was a mechanical part.
I sat on my shop stool and flipped the sander over to look at the bottom. I spun the pad with my hand and it moved way too easily. It felt loose, almost like a toy spinner, which was my first big clue.
Understanding How the Sander Works
To fix it, I had to understand how the machine actually works. A random orbit sander is clever because it does not just spin in a circle. It wiggles around to prevent swirl marks on your wood.
There are a few key parts that make this motion happen. The motor provides power while the bearing helps it spin smooth. The drive belt, or brake, controls the speed. When one link breaks, the spin stops but the noise goes on.
Troubleshooting Checklist for No Spin
| Symptom | Likely Cause | Cost to Fix | Difficulty |
| Motor runs, pad stops on wood | Broken Brake Belt | Low ($5-$10) | Easy |
| Pad falls off or wobbles | Worn Backing Pad | Low ($15-$20) | Very Easy |
| Loud screeching noise | Seized Bearing | Medium ($20+) | Hard |
| Power cuts in and out | Worn Carbon Brushes | Low ($10) | Medium |
Step 1: Checking the Brake Belt
I started my check with the most likely culprit, which is the brake belt. Some people call it a friction ring, but it is really just a rubber band. It sits between the moving pad and the steady housing.

Its job is to create drag and stop the pad from spinning too fast. If it spins too fast in the air, it gouges the wood when you touch it down. When this belt snaps, the pad loses all its control.
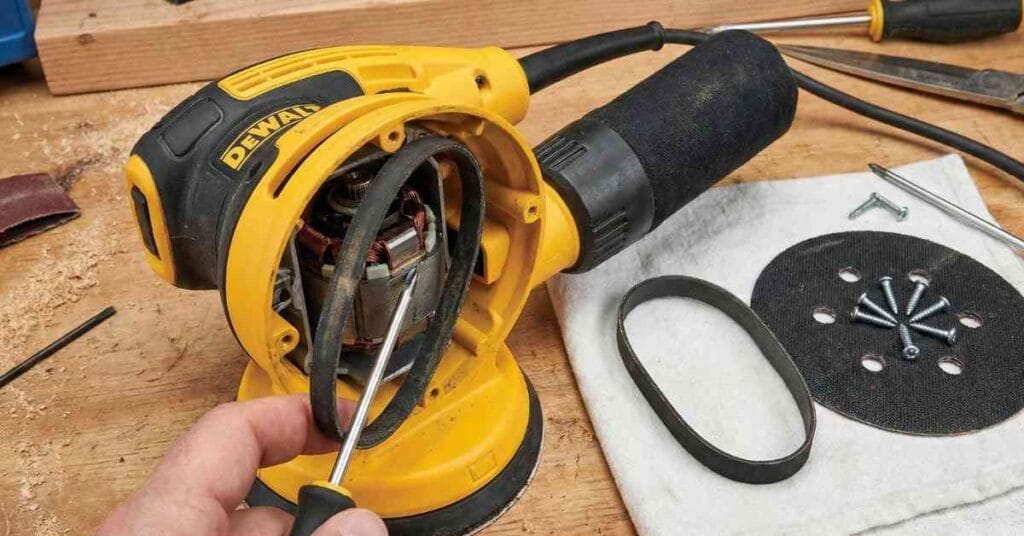
I grabbed my screwdriver and saw my DeWalt uses a T20 Torx bit. I removed the four screws that hold the sanding pad on. I put them in a dish so I would not lose them in the sawdust.
I lifted the pad off and saw the problem right away. The brake belt was in pieces and looked like a shredded tire. A piece of black rubber fell onto my workbench. The belt had worn down over time and finally just gave up.
This was a huge relief to me because it is a cheap fix. I hopped on my phone and found the part for about five dollars. I ordered two of them so I would have a spare for next time.
Step 2: Inspecting the Sanding Pad Interface
While I waited for the part, I looked closely at the pad itself. The pad is made of foam and plastic with hooks on the bottom. Sometimes the issue is not the belt, but the pad is stripped out.
I looked at the screw holes on my pad and they looked okay. If they were cracked, the screws would not hold tight. The motor shaft would spin, but the pad would slip and stay still.
I also checked the hooks because I press down too hard sometimes. Heat melts the hooks, and your sandpaper will fly off while you work. My pad was dirty, but it was solid, so I just cleaned the dust out.
Step 3: Digging Deeper Into Bearings
I wanted to be sure, so I decided to check the bearings too. The bearing is what allows the random motion to happen. If it gets stuck, the sander stops spinning entirely.
I spun the metal fan housing by hand and it moved smooth and quiet. If you hear a grinding sound, you have a bad bearing. That is a harder fix that needs a special tool.
Lucky for me, my bearings were fine and moved freely. It was just that cheap rubber belt that caused the issue. I was glad I did not have to take the whole shell apart.
Step 4: The Clean Up
While the pad was off, I saw a giant mess inside. Dust kills tools because it packs into the vents and creates heat. Heat kills the electronics inside, so you must keep it clean.
I took my air compressor and blew out the housing. A giant cloud of fine dust poofed into the air and I coughed. I used an old toothbrush to scrub the metal surface where the new belt would sit.
It needs to be clean or the new belt will wear out fast. I also checked the dust port and poked a wire through it. A clump of sawdust fell out, so now my vacuum would work again.
The Fix: Installing the New Belt
Two days later, the mail arrived with a small padded envelope. Inside was the new friction ring, which was fresh black rubber. It felt stiff and ready to work.
I went back to the garage to put it all together. I lined up the notches on the belt with the notches on the sander housing. It has to sit flat or it will not work right.
I put the sanding pad back on and tightened the four screws by hand. You should not use a drill here or you will crack the plastic. I plugged it in for the moment of truth.
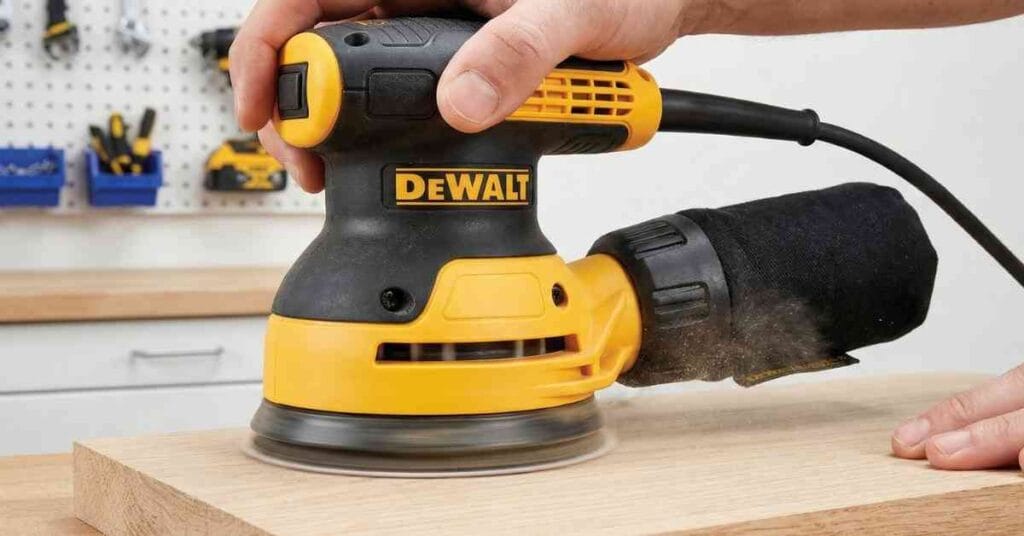
I held it up and turned it on, and the sound was different. It was tighter and the pad spun at the right speed. I touched it to a scrap piece of pine and it kept spinning. It ate through the wood and worked like new.
Why Did This Happen?
I sat back and thought about why it broke now. I realized I had been hard on the tool by pressing down too hard. Many of us lean our body weight onto the sander to work faster.
This is wrong because the weight of the hand is enough. The tool does the work, and pressing down creates heat. You stretch the belt and stress the motor when you push.
I was also lazy with the start-up and did it wrong. You are supposed to turn the sander on before you touch the wood. Starting the sander while it is pressed on the wood snaps the rubber.
Maintenance Tips to Avoid This
I want to avoid doing this again soon, so I made new rules. I will use light pressure and let the grit do the work. If it is not sanding fast enough, I will use a coarser paper.
I will also blow it out after every single project. I use compressed air to clean the vents because dust is the enemy. It only takes a few seconds but it saves the tool.
Every time I change the paper, I look at the pad spin. If it spins too fast in the air, the belt is dying. I will change it before it snaps to save time later.
Final Thoughts
There is a specific feeling you get when you fix something yourself. I was ready to spend eighty dollars on a new sander, but I spent five. I spent twenty minutes in the garage with a screwdriver and saved my tool.
Now, every time I pick up that sander, I feel good. I know how it works and I know I fixed it. The coffee table turned out great, and the finish is glass smooth.
If your sander stops spinning, do not panic or throw it out. Check the belt, clean the dust, and do not press so hard. It is likely an easy win, and we can all use an easy win.
FAQs – DeWalt Orbital Sander Not Spinning
Why does my DeWalt orbital sander stop spinning under load?
A worn brake belt is usually the main cause of this issue. This rubber ring helps the pad grip and spin correctly. If it snaps, the pad stops when it hits the wood.
How do I tell if my sander’s brake belt is bad?
Lift the tool and turn it on safely to check the speed. If the pad spins wildly fast like a grinder, the belt is broken. A good belt keeps the speed steady and safe.
Can I run my orbital sander without the friction ring?
You can, but it risks damaging your wood project. Without the ring, the pad spins too fast and gouges the surface. It is best to replace the part for a smooth finish.
Why does my sander make a loud screeching noise?
A loud screech often means the bearings are stuck or dry. This metal grinding creates heat that can kill the motor. You likely need to replace the bearing assembly soon.
How tight should I screw on the replacement sanding pad?
Tighten the screws by hand until they feel snug. Do not use a power drill or you might crack the plastic backing. Hand-tight is perfect for keeping the pad secure.
As an Amazon Associate, We earn from qualifying purchases