Learning how to use a clamp meter changed my work in the garage. I used to guess why a tool made a hum. I also guessed why a breaker tripped in heat or cold. That was not safe. Then I learned a few easy steps. Life got simple. Work got safe.
This guide shows the same steps I use in real U.S. garages. I also use them on job sites. You will see how to check AC. You will see how to check DC. You will see how to check volts. You will see how to check ohms. I use brands I trust, like Milwaukee, Klein, and Fluke.
The big idea is clear. A clamp meter helps you find a problem fast. You can do it without cutting a wire.

Table of Contents
What Is a Clamp Meter and What Does It Do?
Learning what a clamp meter does helped me fix problems fast in my shop. A clamp meter reads current without a cut in the wire. That keeps you safe. It also saves time. I use it on HVAC units. I use it on car parts. I use it on simple home tools too. The big idea is easy. The clamp meter reads the magnetic field around the wire. That is why it is safer and easier than an inline meter.
How Does a Clamp Meter Work?
My first clamp meter shocked me with how simple it felt. You clamp the jaws on one wire. The meter reads the field around that wire. The meter turns that field into a current value. That is all it does. The main point is clear. Power makes a field. The clamp reads that field.
I learned that AC-only clamp meters use a CT core. They only read AC. They work great on home loads and shop tools. The key point is simple. CT clamps read AC only.
Later I bought a Hall Effect clamp meter. It reads AC and DC. I use it on cars, RVs, solar lines, and big batteries. The main idea is this: Hall Effect = AC and DC.
I learned one rule the hard way. The clamp must go on one wire. If you clamp hot and neutral at once, the fields cancel. The meter shows “0 A” even when the tool pulls power. The key lesson is that one wire gives the true reading.
I once used my clamp meter on a stuck garage-door opener. The motor hummed, but the door did not move. The clamp meter showed high current. That told me the motor was jammed, not dead. The main point is that one fast reading can show the real fault.
Types of Clamp Meters Explained
I have used three types of clamp meters. Each one fits a different job.
AC-only CT meters: These meters work well on home loads and shop tools. They are simple and tough. The key point is that CT meters read AC only.
AC/DC Hall Effect meters: These work on cars, trucks, RVs, and solar lines. They read AC and DC. The key idea is that they handle both types of power.
Flexible Rogowski coils: I use these in tight spots or on big wires. They wrap around large lines with ease. They read AC only. The key point is that Rogowski coils shine in tight or crowded spots.
When I pick a meter, I match the type to the job. That rule keeps my readings clean.
What Safety Rules Should You Follow Before Using a Clamp Meter?
Clamp meters feel simple. But I treat them with care. One slip can hurt you or your gear. I learned a few habits over the years. These habits keep me safe in my shop and on job sites. The key idea is that all tests need respect for power.
Why CAT Ratings Matter (CAT II vs CAT III vs CAT IV)
I did not care about CAT ratings at first. Later I learned they matter a lot. A CAT rating shows how safe the meter is in different spots.
Here is how I use them in the U.S.:
- CAT III for my home breaker box
- CAT II for wall outlets
- CAT IV for outdoor lines
OSHA and NFPA 70E both stress the right CAT rating. The key point is simple. CAT ratings guard you from spikes.
PPE and Shop Safety Checklist
I keep my safety gear close. Gloves help. Glasses help. Dry hands help. Humid days in Florida make tools wet. Dry air out West can make static. I keep my hands behind the guard when I open the clamp. The key idea is that small habits keep you safe.
Lockout/Tagout Basics for DIYers
I never trust a panel at first look. I check for zero volts. Then I check again. A breaker can look “off” but still feed power. If someone asks, “Do I need to shut off power to use a clamp meter?” I say yes for any test with leads. I say no only when I clamp one insulated wire. The key point is clear. Confirm power before you touch anything.
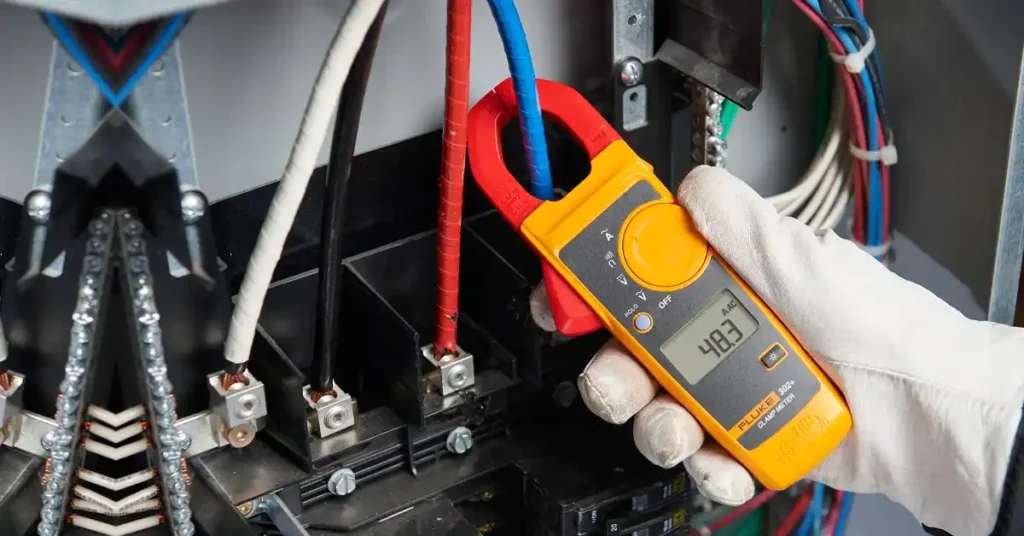
How Do You Use a Clamp Meter to Measure AC Current?
I measure AC current the most. It helps with tools, home gear, and HVAC loads. When I learned the right steps, my readings got clean. I stopped making bad guesses. The key idea is that simple habits give true AC readings.
Step-by-Step AC Current Measurement
Here is how I do it:
- I set the dial to AC amps.
- I clamp one wire only.
- I keep the wire in the center of the jaws.
- I read the screen.
This plan gives a steady and true reading. The key point is that good setup gives clean data.
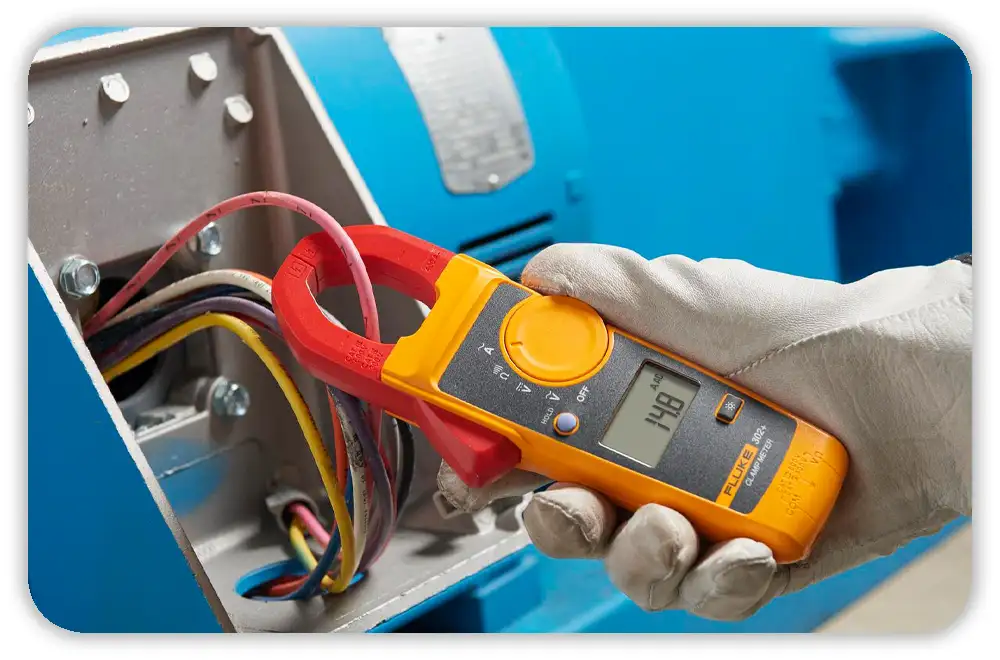
Why the Single-Conductor Rule Matters
My worst readings came from clamping hot and neutral at once. The fields canceled. The meter showed “0 A.” I once did this with a Craftsman table saw. I thought the saw was dead. But the cord fooled me. When I clamped the hot wire only, the reading was right. The key idea is that one wire gives the true value.
Why True RMS Matters for Modern Loads
Modern tools use electronics. LED lights, VFD motors, and microwaves draw odd wave shapes. Cheap meters miss that. I once checked a DeWalt air compressor with a basic meter. It showed a low load. My True RMS meter showed the real higher load. The key idea is that True RMS keeps AC readings honest.
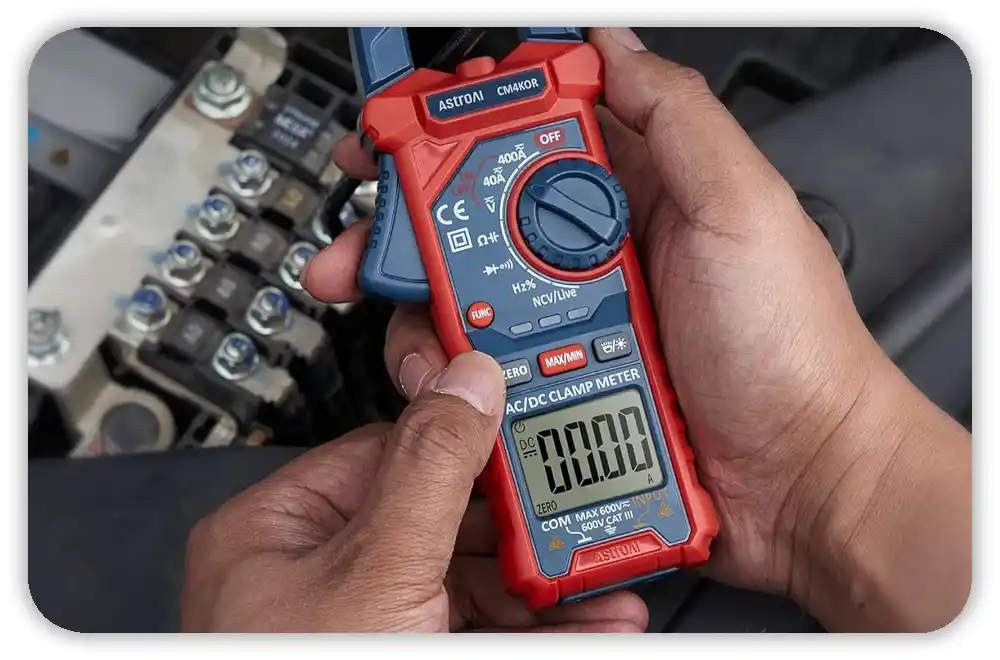
How Do You Measure DC Current With a Clamp Meter?
DC tests felt hard at first. Then I learned the steps. You must use a Hall Effect meter for DC. An AC-only meter will show zero. The main idea is simple. DC tests need the right sensor and a clean setup.
The DC Zeroing (Tare) Procedure
My first DC tests were wrong. I forgot to zero the clamp. The jaws hold a small magnetic charge. That adds bias. Now I close the jaws, keep still, and press the zero button. I learned this while testing a truck alternator on a cold day. The key point is that zeroing clears false data.
Understanding Positive and Negative Readings
Clamp meters show direction. If the arrow points toward the load, the number is positive. If I flip the clamp, the number goes negative. I see this a lot on RV solar lines. The key idea is that direction shows the flow.
How to Measure Low DC Currents Safely
Small DC loads are hard to read. Some meters miss them. To fix that, I wrap the wire around the jaws a few times. More turns make a stronger field. Then I divide the reading by the number of turns. I use this trick to find parasitic draws in cars. The key point is that wire wraps boost low-amp readings.
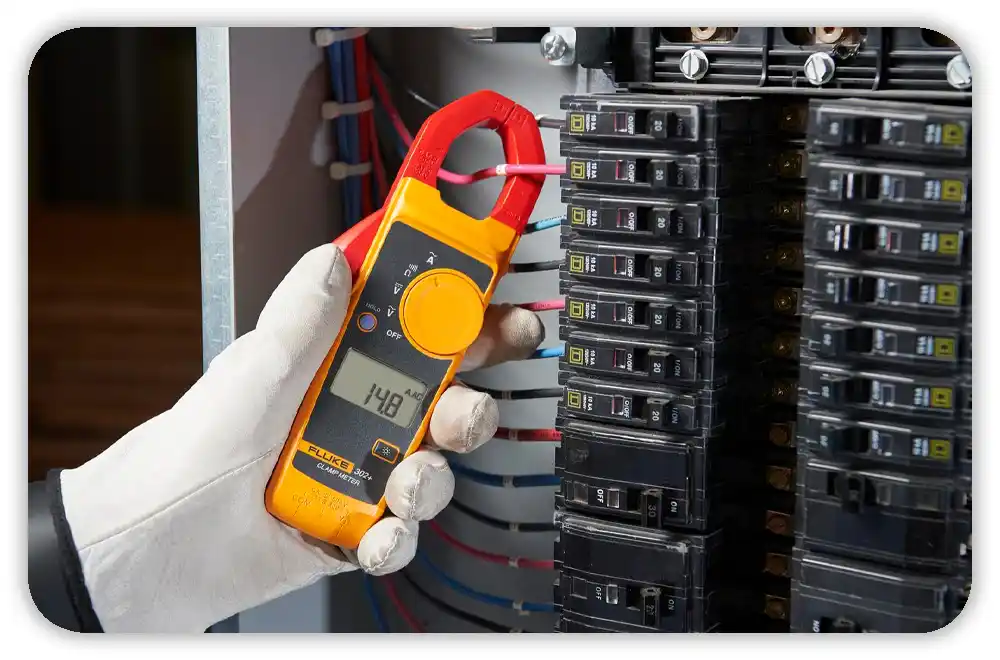
How Do You Measure Voltage With a Clamp Meter?
I check voltage when I need a fast test on a tool, an outlet, or a car battery. Most clamp meters come with leads, so the job is easy. I follow a few steps to stay safe. The key idea is that voltage tests need care and the right mode.
Setting Up the Meter for Voltage
I plug in the COM lead first. Then I plug in the V lead. I set the dial to AC volts or DC volts. I check if the meter is in auto-range or manual range. The main point is that a clean setup makes each test safe.
Real-World Voltage Tests
I check a wall outlet for about 120V AC. I check a car battery for about 12.6V DC. I also test HVAC parts before summer or winter. These fast checks help me find small issues early. The key idea is that small checks stop big problems.
Big Warning — Never Measure Voltage in Current Mode
One mistake can kill a meter. If the dial stays in amps and you try to check volts, the fuse can blow fast. I always pause and check the dial. This habit has saved me many times. The main point is simple: check the mode before every test.
How Do You Use a Clamp Meter to Measure Resistance and Continuity?
I use these tests when a tool will not run or a fuse blows. These tests need the power off. That rule keeps me safe. The key idea is that the circuit must be dead.
Why the Circuit Must Be De-Energized
The meter sends a small signal through the part. If the part is live, the test is wrong or unsafe. I pull the plug or turn off the breaker before I test. The key point is that dead circuits give true readings.
Resistance Testing Steps
I set the dial to ohms. I touch the leads to the part. A rising value can mean the part is weak. A stable value is good. “OL” means open. I use this test on switches and small tool parts. The main idea is that ohm tests show health.
Continuity Testing (Beep Test)
Continuity is my first test on a dead tool. The beep shows if power can flow. I once fixed a Milwaukee grinder that kept cutting out. The cord had a break. The beep test found it fast. The key point is that the beep shows a good path.
How to Use a Clamp Meter for HVAC, Automotive, and DIY Diagnostics
A clamp meter helps most when things stop working. I use mine on HVAC units, cars, and home tools. These tests save time and guesswork. The key idea is that a clamp meter shows faults fast.
HVAC Diagnostics
I check compressor inrush when a unit fights the summer heat. I listen for fan motors that hum but do not spin right. I test run caps that may be weak. These small checks point me to the fault fast. The main point is that HVAC loads tell a clear story.
Automotive Diagnostics
I test parasitic draw when a battery dies at night. I check alternator output when lights dim. I also test EV lines on newer cars. The key idea is that DC tests show real car issues.
Home & DIY Tool Troubleshooting
I test my table saw when it trips a breaker. I check my air compressor when it struggles in cold weather. I check my small generator during storms. The key point is that fast tests keep your tools ready.
How Do You Use the Inrush Current Function on a Clamp Meter?
Inrush tests helped me learn why tools trip breakers. Motors need a big push to start. The clamp meter shows that spike. The key idea is that startup loads rise fast.
What Is Inrush Current in Simple Words?
A motor needs extra power to wake up. That surge can be 5 to 20 times higher than the normal draw. I see this on compressors, saws, and shop vacs. The main point is that inrush is the startup hit.
How to Capture Inrush Correctly
I set the meter to INRUSH mode. I clamp one wire. I start the tool. The meter grabs the peak. I use this when a tool feels slow or weak. The key idea is that inrush shows hidden load issues.
Real Example
My air compressor tripped a 15A breaker every winter. I feared the motor was bad. The inrush test showed a huge spike from cold oil. That solved the issue. The main point is that inrush shows the real cause.
What Common Clamp Meter Mistakes Should You Avoid?
I have made many clamp meter mistakes. Most were small. A few were close calls. These mistakes happen fast when you rush. The key idea is that slow habits keep you safe.
Measuring Voltage in Amp Mode
This was my first big mistake. I left the dial in amps and touched a live point. The fuse blew right away. Some meters burn for good. Now I stop and check the dial before each test. The main point is that amp mode and voltage do not mix.
Skipping DC Zeroing
I used to forget the zero button on my Hall meter. My DC readings jumped a lot. The jaws hold a small bit of magnetism. That can fool you. Now I close the jaws and press zero each time. The key idea is that zeroing clears bias.
Clamping the Wrong Wire
At first, I clamped a full cable by mistake. Hot and neutral sat in the jaws. The fields canceled. The meter showed “0 A.” I thought the tool was dead. When I clamped one wire, the reading made sense. The main point is that one wire gives the real value.
Using a Non-True-RMS Meter on Modern Loads
My old meter read low on anything electronic. LED lights, microwaves, and VFD motors pull odd shapes. Only my True RMS meter gave the right number. I learned this while testing a DeWalt compressor in winter. The key idea is that True RMS keeps modern readings honest.
Buying Guide — What Clamp Meter Features Matter Most?
I have used many clamp meters in shops, garages, and job sites. Some features help a lot. Some do nothing. A few even cause issues. The key idea is that the right features make the job simple.
Features That Matter
These are the features I pick first:
- AC/DC mode for car and battery work
- True RMS for odd wave shapes
- CAT rating for safe panels and outlets
- Inrush mode for slow or hard starts
- Backlight for dark panels
These few features cover most daily tests. The key point is that good features fix real problems.
Brands I’ve Used and Recommend
I use different brands for different tasks:
- Fluke for pro shops
- Klein Tools for most electrical work
- Milwaukee for DIY and pro tool tests
- Craftsman for basic budget use
Each brand has strengths. I pick based on the job, not the logo. The main idea is that the task picks the meter.
When to Upgrade Your Meter
I upgrade when the jaws feel loose. I upgrade when zero drifts. I also upgrade when numbers jump for no reason. A bad meter can lead you the wrong way. The key point is that bad readings mean it is time to move on.
FAQs: How to Use Clamp Meter
I hear the same clamp meter questions from friends and neighbors. These simple answers help you start fast. The key idea is that clear steps build skill.
How do I use a clamp meter for AC?
Clamp one wire. Set it to AC amps. Read the screen.
Can a clamp meter measure DC amps?
Yes, but only with a Hall meter. AC-only meters show zero.
Do I need to turn off power to use a clamp meter?
Yes for ohms or continuity. No for clamp tests on insulated wires.
How accurate are clamp meters?
Most are fine for home and shop work. True RMS is best for modern loads.
What’s the difference between AC and DC clamp meters?
AC meters use a CT core. AC/DC meters use a Hall sensor.
Final Tips — Build Confidence With Every Test
Clamp meters make work simple when you use them right. I start with easy tests. I follow safe steps. I use a meter I trust. These habits help me stay calm when a tool hums or a breaker trips on a cold night. The key idea is that slow practice builds real confidence.
As an Amazon Associate, We earn from qualifying purchases