Ever wondered if you can use a belt sander on hardwood floors? I’ve had that same thought many times while sanding floors in real U.S. garages — from humid Florida summers to dry Arizona winters. The truth is simple. It depends on your control, how you prep the floor, and the tool you use.
I’ve tested DeWalt, Craftsman, and Makita sanders side by side to see which one really works best on hardwood. Here’s what I found — how each belt sander handles real floors, which grit and speed work best, and how to avoid gouges or uneven spots.

Table of Contents
What Is a Belt Sander and How Does It Work?
When I first used a belt sander, I didn’t know how strong it was. It looked simple — two rollers, a sandpaper belt, and a small motor. But the moment I pulled the trigger, it kicked forward like a tiny jet. That’s when I knew this tool meant business.
A belt sander runs a loop of sandpaper around two drums. The motor spins the belt fast, scraping wood in seconds. It’s made for heavy sanding, not fine finishing. When I use mine on hardwood, the grain flattens almost at once. Impressive, yes — but risky if you pause or tilt.
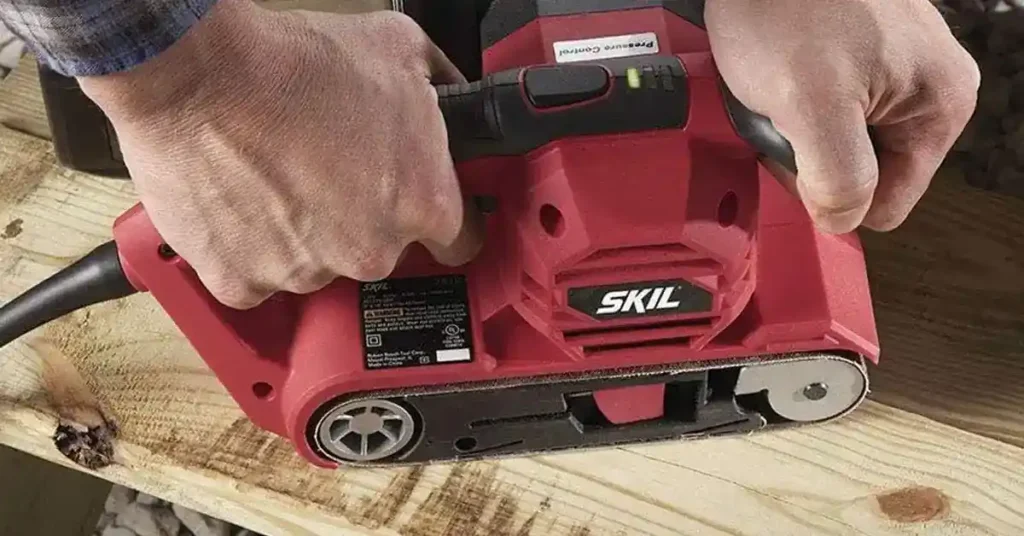
I’ve used DeWalt, Craftsman, Makita, and Milwaukee models. Each one works well but acts a little different. In humid Florida, belts clog faster. In dry Arizona, static dust sticks to everything. The climate matters more than most people think.

Understanding the Tool’s Design
A belt sander looks simple, but its design explains why it’s hard to control. The sandpaper belt rides on two drums — one powered, one free. Under the belt is a metal plate called a platen. That plate presses the belt flat against the wood. Because the contact area is small, the sanding is very aggressive.
When I sand hardwood floors, the sander cuts deep and fast. Great for removing thick finishes, but a tiny pause can leave a gouge that won’t go away. I always tell people: treat it like a chainsaw, not a paintbrush. It’s powerful, not gentle.
Why It’s So Aggressive
Belt sanders are fast because of high RPMs and pressure. The spinning belt hits the wood hard on that small platen area. I learned this the hard way — once, I leaned too much and burned through a floor finish in seconds.
That’s why they’re great for small repairs or leveling spots, but not for full floors. Keeping the surface even over a big room takes pro-level control. Think of it as a scalpel, not a bulldozer.
Can I Use a Belt Sander on Hardwood Floors?
Yes, you can — but it’s not ideal. I’ve used one for small jobs like stairs or corners. It works if you move steady and stay focused. But for big areas, I always switch to a floor or orbital sander.
A handheld belt sander can handle hardwood, but not full-room jobs. I once tried to sand an entire living room that way — my back hurt, and the floor looked uneven. Lesson learned.
When It’s Mechanically Possible
You can use a belt sander safely when:
- The floor is solid hardwood (not engineered).
- You’re working on small patches or stairs.
- The boards are flat and stable.
In those cases, it works great. Just keep the sander moving, go with the grain, and smooth later with an orbital sander.
When It’s a Terrible Idea
Don’t use a handheld belt sander if:
- You’re sanding a large area.
- The floor has a thin veneer or was sanded before.
- You’re new to high-power tools.
I once tried it in a small rental, hoping to save money. Instead, I spent days fixing dips and waves that showed after finishing. Sometimes saving money costs more time.
The Better Alternatives
Here’s what works better for floors:
- Walk-behind belt or drum sanders – heavy and steady for big rooms.
- Orbital or square sanders – slower but safer for DIYers.
- Detail sanders – great for corners and edges.
In the U.S., stores like Home Depot or Lowe’s rent all of these. Many come with dust collection, which keeps the air clean and the floor smooth.
What Are the Risks of Using a Belt Sander on Hardwood Floors?
People often ask, “Can I use a belt sander on hardwood floors safely?” My answer: only if you know the risks.

Surface Damage
The biggest danger is gouging. One pause or tilt and you’ll dig into the wood. I’ve seen it happen in seconds. You can’t hide deep divots — they stay forever.
You might also see chatter marks, those small waves that show after finishing. They come from uneven pressure or a worn belt. And if you hang half the sander off the edge, it’ll round the board corners fast.
Dust and Safety Hazards
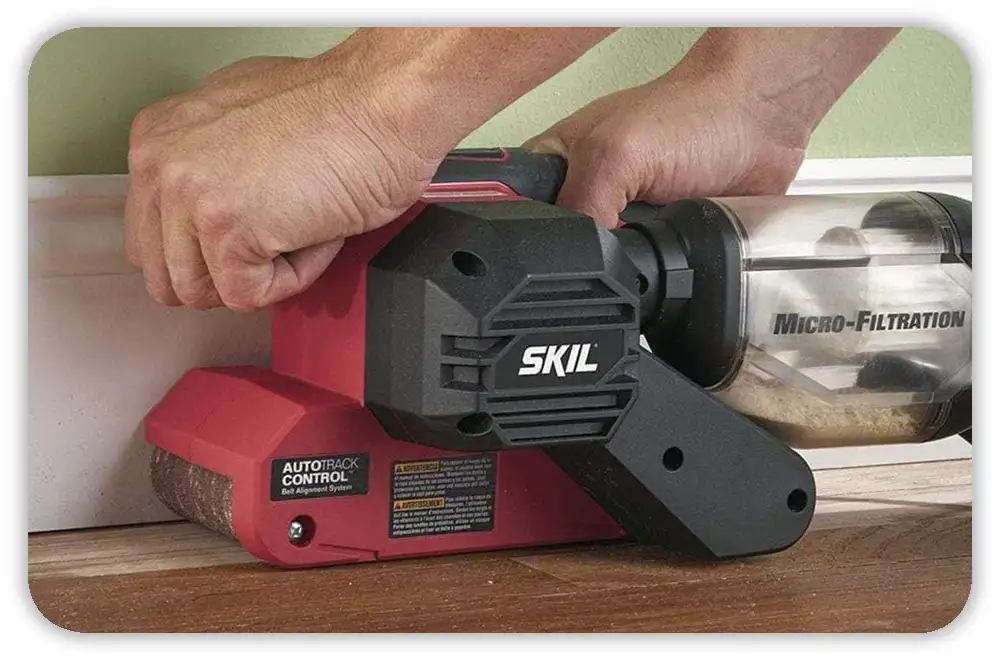
Belt sanders throw out a lot of fine dust. It can reach your lungs, your house, even your vents. Always wear a mask and use a HEPA vacuum.
They’re loud too — mine hits over 90 decibels. I wear ear protection every time.
And here’s a key safety tip: under OSHA rules, always use dust collection. Fine dust can ignite, especially in dry air. I’ve seen static sparks on Arizona jobs before.
When Is It Smart to Use a Belt Sander on Hardwood Floors?
Most times, using a belt sander on hardwood floors is risky — but not always. I’ve learned there are moments when it’s the right call. Small areas, tight spaces, and stubborn spots are where this tool really earns its keep. The trick is knowing when to stop before it causes damage.
Best-Case Scenarios (Green-Light Uses)
Over the years, I’ve found a few times when my belt sander was the perfect choice:
- Refinishing stair treads or thresholds. Large floor sanders don’t fit here, and a belt sander gives me control. I move slowly, keeping the grain direction in mind.
- Leveling a warped or cupped board. When one plank sits higher than the rest, a few steady passes with a 60-grit belt can even it out.
- Removing stains, paint, or finish in one small zone. Sometimes I only need to clean up a patch near a door or repair a water spot.
In my Florida projects, I’ve used it to strip sticky varnish on stairs that a drum sander couldn’t reach. The humidity makes finishes soften fast, so a light touch matters.
If your job is contained and controlled, a belt sander can save time — as long as you respect its speed and stay patient.
Situations to Avoid (Red-Light Uses)
Just because you can use a belt sander doesn’t mean you should. I’ve made that mistake myself.
Here’s when I learned to put it down:
- Large open floors. Rooms like living or dining areas are too big. You’ll never keep the surface flat by hand.
- Antique or engineered hardwood. Thin wear layers disappear fast. One wrong pass can sand through the veneer.
- High-visibility projects. If the goal is a flawless, mirror-smooth floor, a belt sander just isn’t the right tool.
In my early days, I tried using one across an entire oak floor in a rental home. The results looked fine until I turned on the lights — then I saw dips and waves across the boards. That’s when I realized: sometimes it’s smarter to rent a proper floor sander than fix costly mistakes later.
So yes, a belt sander can help, but only when the job is small, precise, and controlled.
How to Use a Belt Sander Safely on Hardwood Floors
If you’ve decided the job fits a belt sander, great — but safety and setup come first. A little prep time can save hours of cleanup and prevent permanent damage. Over the years, I’ve learned that technique and patience are what separate clean, even results from disaster.
Preparation and control make all the difference between a pro finish and a mess.
Step 1 — Prep the Room
Before touching the tool, I always make the space safe and dust-ready:
- Remove furniture, rugs, and vents so nothing gets covered in dust.
- Sink any nail heads with a punch; one loose nail can tear a sanding belt instantly.
- Seal doorways and HVAC vents with plastic. Fine dust spreads fast through ductwork.
- Create negative airflow with a box fan in a window blowing out. It keeps fresh air moving in.
In humid southern shops, I’ve found this airflow helps control both dust and moisture. A clean, sealed space is step one to clean sanding.
Step 2 — Choose the Right Belt
Belt choice changes everything. Here’s how I match grit to the job:
- 40–60 grit: for heavy stripping and leveling.
- 80–120 grit: for smoothing and blending.
- 180–220 grit: for final surface prep before finishing.
For hardwood, I stick to aluminum oxide or zirconia belts — they cut fast and last longer. In hot climates, open-coat belts resist clogging better. I learned that while sanding maple in a sticky Florida garage — the closed belts loaded up in minutes.
Always unplug before swapping belts and make sure the arrows match the sander’s rotation. A simple step that prevents early tearing.
Step 3 — Sand with Proper Technique
Technique is everything. I always:
- Let the tool reach full speed before touching the floor.
- Keep it flat and moving at all times.
- Sand with the grain for the smoothest results.
- Let the sander’s own weight do the work — never push.
- Lift the front end slightly before stopping to avoid “stop marks.”
I still remember my first mistake — pausing mid-pass on an oak plank. The divot it left showed through every coat of finish. Ever since, I move in steady, even strokes and never stop until the pass is done.
Step 4 — Progress Through Grits
Rushing grit progression ruins good floors. I start coarse, then move finer: 40 → 60 → 80 → 100 → 120.
After each grit:
- Vacuum the floor and nearby surfaces.
- Empty the vacuum or dust bag.
- Wipe with a tack cloth to catch leftover particles.
Skipping steps saves minutes but leaves deep scratches that show later. I’ve seen it — a “shortcut” sanding job that looked fine until stain highlighted every swirl mark. Take the time; it pays off.
For the final pass, I often switch to a random orbital sander. It blends the belt’s marks and gives a smooth, even texture that accepts finish beautifully.
How to Prevent Common Belt Sander Mistakes
Even with experience, mistakes happen fast. Belt sanders remove material quicker than you can blink, so control matters most. I’ve learned these lessons firsthand — sometimes the hard way.
A little awareness now can save your floor later.
Gouges and Divots
The easiest mistake is leaving the sander in one spot too long. It only takes a second to dig a hole. I keep both hands firm, let the tool glide, and never start or stop on the wood.
Before I touch a finished floor, I practice on scrap boards. It’s a simple way to get a feel for balance and motion. The more natural your rhythm, the fewer scars you’ll leave behind.
Burn Marks
Burn marks mean too much pressure, too much heat, or a dull belt. I’ve seen dark streaks appear when the belt glazed over or when I pressed too hard out of frustration.
Now I replace belts early and work in short bursts. If I feel heat through the handle, I stop. In humid areas, I switch to open-coat abrasives — they stay cooler and resist resin buildup.
Cool sanding is clean sanding. If you smell burning wood, ease up and let the tool rest.
Dust Control & Safety
Dust is sneaky — it hides everywhere. I always:
- Wear ANSI-rated goggles, a NIOSH respirator, and hearing protection.
- Keep gloves off. They can catch in the moving belt — I’ve seen that happen in a buddy’s shop.
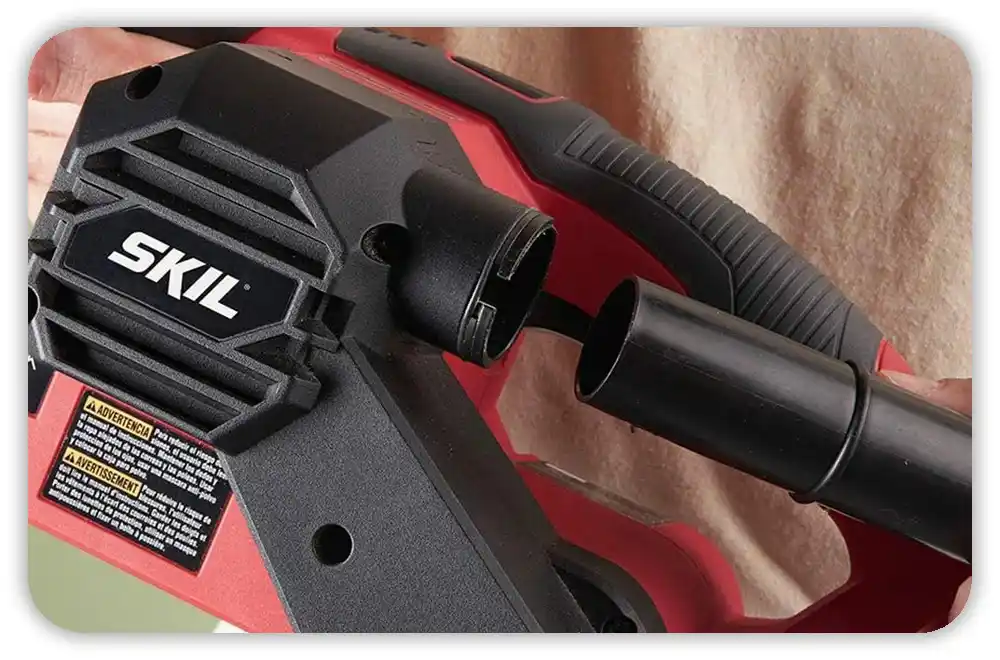
- Use a shop vac or HEPA collector connected to the dust port whenever possible.
I also check cords often. In older garages, outlets can be loose or ungrounded, so I use GFCI protection when I’m working near concrete or in damp spaces.
Safe habits might feel slow, but they keep you sanding for years — not just one project.
What Are the Alternatives for Full-Room Sanding?
After trying to sand a full hardwood floor with a handheld belt sander once, I learned fast. The floor looked uneven, and my arms were shot. For big spaces, you need pro-grade machines. They’re heavy, smooth, and made to cover large areas without leaving dips or marks.
Walk-Behind Belt Sander
If you’re sanding a full floor, a walk-behind belt sander is a life-saver. It’s heavy, stable, and smooths wood without a fight. I’ve used models from Clarke and Lagler Hummel on solid oak floors. Both give clean, even results when set up right.
Most U.S. rental stores — like Home Depot or Sunbelt Rentals — have them. Buying one costs a lot, but renting for a weekend is affordable. The machine’s weight does most of the work, so it feels calm and easy to guide.
Drum Sander
A drum sander is even stronger. It can strip off old finish in one pass. But that power needs skill. When I first used one, I forgot to lift it at the end and left chatter marks everywhere.
Once you get the rhythm, it’s unbeatable for deep sanding or worn wood. It needs control and steady movement. If you stop mid-pass, you’ll see a mark you can’t hide.
Orbital or Square Buff Sander
If friends ask me which sander to rent for their first floor project, I say: get an orbital or square buff sander. They’re slower but safer. You won’t dig holes or gouge the wood.
I’ve used them in bedrooms and hallways to smooth floors before refinishing. You can rent one almost anywhere in the U.S. — Lowe’s, Home Depot, or local shops.
They take more time but give a fine, even finish. If you want safety and smooth results over speed, this is the way to go.
How to Finish and Protect Your Sanded Floor
After sanding, the final step is protecting the wood. The right finish seals your work and keeps out moisture, dirt, and wear. I once skipped cleanup before sealing — and sealed dust right into the finish. Never again.
A clean surface is the secret to a perfect finish.
Cleanup and Dust Removal
When you finish sanding, clean like your results depend on it — because they do. I always:
- Vacuum slowly, moving with the grain.
- Use a tack cloth or microfiber mop for fine dust.
- Check corners and edges with a bright light.
If you skip this, you’ll trap dust under the finish and see bumps or dull spots later. In dry areas like Arizona, static pulls dust back. I mist the air lightly to keep it down before sealing.
Staining and Sealing
Once the floor is spotless, it’s time for color or clear coat. I use two main finishes:
- Polyurethane: Warm look, best for high-traffic areas.
- Water-based: Dries fast and smells less, great in cold weather.
Apply thin, even coats with a foam pad or lambswool applicator. Let each coat dry fully before the next. Between coats, scuff lightly with 220-grit paper to keep things smooth.
Patience pays off. Rushing leaves streaks or bubbles. Take your time — the wood will reward you with a soft, even glow.
Good prep and clean layers protect your hard work for years.
Expert Insights: Lessons From Real Projects
After years of sanding floors in different states, I’ve learned more from mistakes than from perfect jobs. Real success comes from patience, good tools, and adjusting for your environment.
Here are a few field notes from me and other pros I’ve met around the U.S.
Field Notes
“I used a handheld Craftsman to fix one warped board — then switched to an orbital for blending.”
I’ve done the same. The belt sander is great for small fixes but needs a gentler tool to even the area.
“In Florida humidity, I always use a GFCI outlet and open-coat belts.”
Same here. Moist air and fine dust can trip breakers fast. Open-coat belts stay cooler and resist clogging.
“On older oak floors, slow grit changes save hours of rework.”
That’s true. Skipping grits may seem faster, but every missed step shows in the finish later.
Each job teaches something new. The more you listen to the wood — and your tools — the better the result. Every floor tells a story, and your job is to bring it back to life with care, not speed.
FAQs — Belt Sanders and Hardwood Floors
I get a lot of the same questions from people thinking about using a belt sander on hardwood floors. Here are the clear, simple answers I’ve learned from real jobs — some the easy way, and some the hard way.
Can a Belt Sander Replace a Floor Sander?
No, it can’t — and I say that from experience. A handheld belt sander can’t keep large floors flat. It’s perfect for edges, stairs, or small repair spots, but not for full-room work. When I once tried sanding a full living room, the surface came out wavy. Floor sanders stay level because they’re heavier and balanced. Handhelds just don’t have that control.
What Grit Should I Start With?
The grit depends on how rough the surface is. For heavy removal, start with 40 or 60 grit. For smoothing, move up to 80 or 100. Finish around 120 before sealing. I follow this order every time — it’s simple and works well. Starting too fine takes forever. Starting too coarse can leave deep scratches that show later.
Can I Use a Belt Sander on Engineered Floors?
No — and this is one rule you shouldn’t test. Engineered wood has a very thin top layer, often less than 1/16 inch. A belt sander can eat through that layer in seconds. If you’re working with engineered flooring, stick with a light buff or screen. Anything more aggressive can expose the plywood core.
How Do I Avoid Dust in My Home?
Belt sanders throw dust farther than you’d think. It can reach vents, closets, even other rooms. I learned this the hard way after sanding one stair landing and finding dust in the kitchen the next day.
Now, I always:
- Seal vents and doors with plastic and painter’s tape.
- Attach a HEPA vacuum to the sander’s dust port.
- Use a box fan in a window blowing air outside.
Final Verdict — Should You Use a Belt Sander on Hardwood Floors?
After sanding everything from old oak stairs to maple hallways, here’s my honest take: yes, you can use a belt sander on hardwood floors — but only for small, careful fixes.
It’s a precision tool, not a full-room machine.
When I started, I tried to sand big areas with a handheld sander. The result? Uneven boards and sore arms. Now I use it only for single boards, stair treads, or tight corners near walls.
That’s where it truly shines.
As an Amazon Associate, We earn from qualifying purchases